Introduction
If you have ever been halfway through a Domino’s order and found yourself adding cheesy stuffed bread to the cart almost by reflex, this recipe is going to change everything. Cheesy stuffed bread made from scratch at home is softer, fresher, and more deeply satisfying than anything that arrives in a delivery box. The dough is pillowy and light, the mozzarella center is gooey and fully melted, and the garlic butter finish hits every single note you are craving.
I developed this version after testing several batches in my own kitchen, and I can honestly say the result is better than takeout in every way. If you love homemade bread that pulls apart beautifully and stretches with every bite, you will also want to try these Soft Garlic Cheese Rolls alongside it for a complete cheesy bread spread.
Why This Cheesy Stuffed Bread Is Special
What separates great cheesy stuffed bread from the kind that disappoints you is a combination of three things: the right dough texture, the right cheese, and proper sealing technique. Get all three right and the result is extraordinary. Get any one wrong and the cheese leaks, the crust goes dry, or the inside turns dense. This recipe is designed to eliminate all three failure points.
The dough in this recipe uses a modest amount of olive oil, which keeps the crumb soft long after baking. Unlike pizza doughs that aim for chewiness and structure, this dough prioritizes tenderness. The goal is bread that yields easily when you pull it apart, revealing a glossy, stretchy cheese center that has nowhere to go but straight into your mouth.
The butter-garlic finish at the very end is not optional — it is the step that makes the difference between a loaf that tastes like homemade bread and one that tastes like something a professional made. Brushed on immediately after baking while the crust is still hot, the butter soaks in just slightly and adds that signature richness you recognize from your favorite takeout version.
Key Ingredients Overview
Every ingredient in cheesy stuffed bread has a specific job to do, and understanding those roles will help you make better decisions if you need to substitute or adjust.
The flour is your foundation. All-purpose flour gives you a dough that is easy to work with and produces a soft, slightly tender loaf. Bread flour can be used as a substitute for a chewier result, but for a Domino’s-style texture, all-purpose is the right call. The instant yeast is what gives the dough its lift and that beautiful, airy crumb. Unlike active dry yeast, instant yeast does not need to be proofed separately — it goes directly into the dry ingredients and activates during mixing. A small amount of sugar supports fermentation and adds a very subtle sweetness that balances the salt in the dough.
Olive oil contributes richness and helps the dough stay soft even after it cools. Warm water hydrates everything and activates the yeast. And the mozzarella — specifically low-moisture mozzarella — is what creates that perfect, long cheese pull that makes cheesy stuffed bread so visually and texturally satisfying. If you enjoy baking with cheese and butter in combination, you might find Triple Cheese Garlic Bread worth exploring for your next bread baking session.
")
Understanding the Science Behind Cheesy Stuffed Bread
How Gluten Development Creates Structure
When you mix flour and water and then knead the dough, gluten strands form and link together into a network. This network is what holds the shape of the dough, traps the gas produced by the yeast, and prevents the cheese filling from breaking through the walls during baking. The 8 to 10 minutes of kneading called for in this recipe is the minimum needed to develop a reliable gluten structure.
Under-kneaded dough tears easily and will not hold its filling. In my experience, dough that passes the windowpane test — where a small piece can be stretched thin enough to see light through without tearing — is ready to go. Take the time to knead properly and the rest of the process becomes significantly easier.
How Yeast Leavening Affects the Crumb
Yeast consumes the sugar in the dough and produces carbon dioxide as a byproduct. Those CO2 bubbles get trapped in the gluten network and cause the dough to rise. The longer and slower the rise, the more complex the flavor becomes. For this recipe, a 45 to 60 minute room-temperature rise is enough to double the dough and create a pleasant, lightly flavored crumb. If you have time, a cold overnight ferment in the refrigerator will deepen the flavor considerably.
Why Cheese Sealing Matters
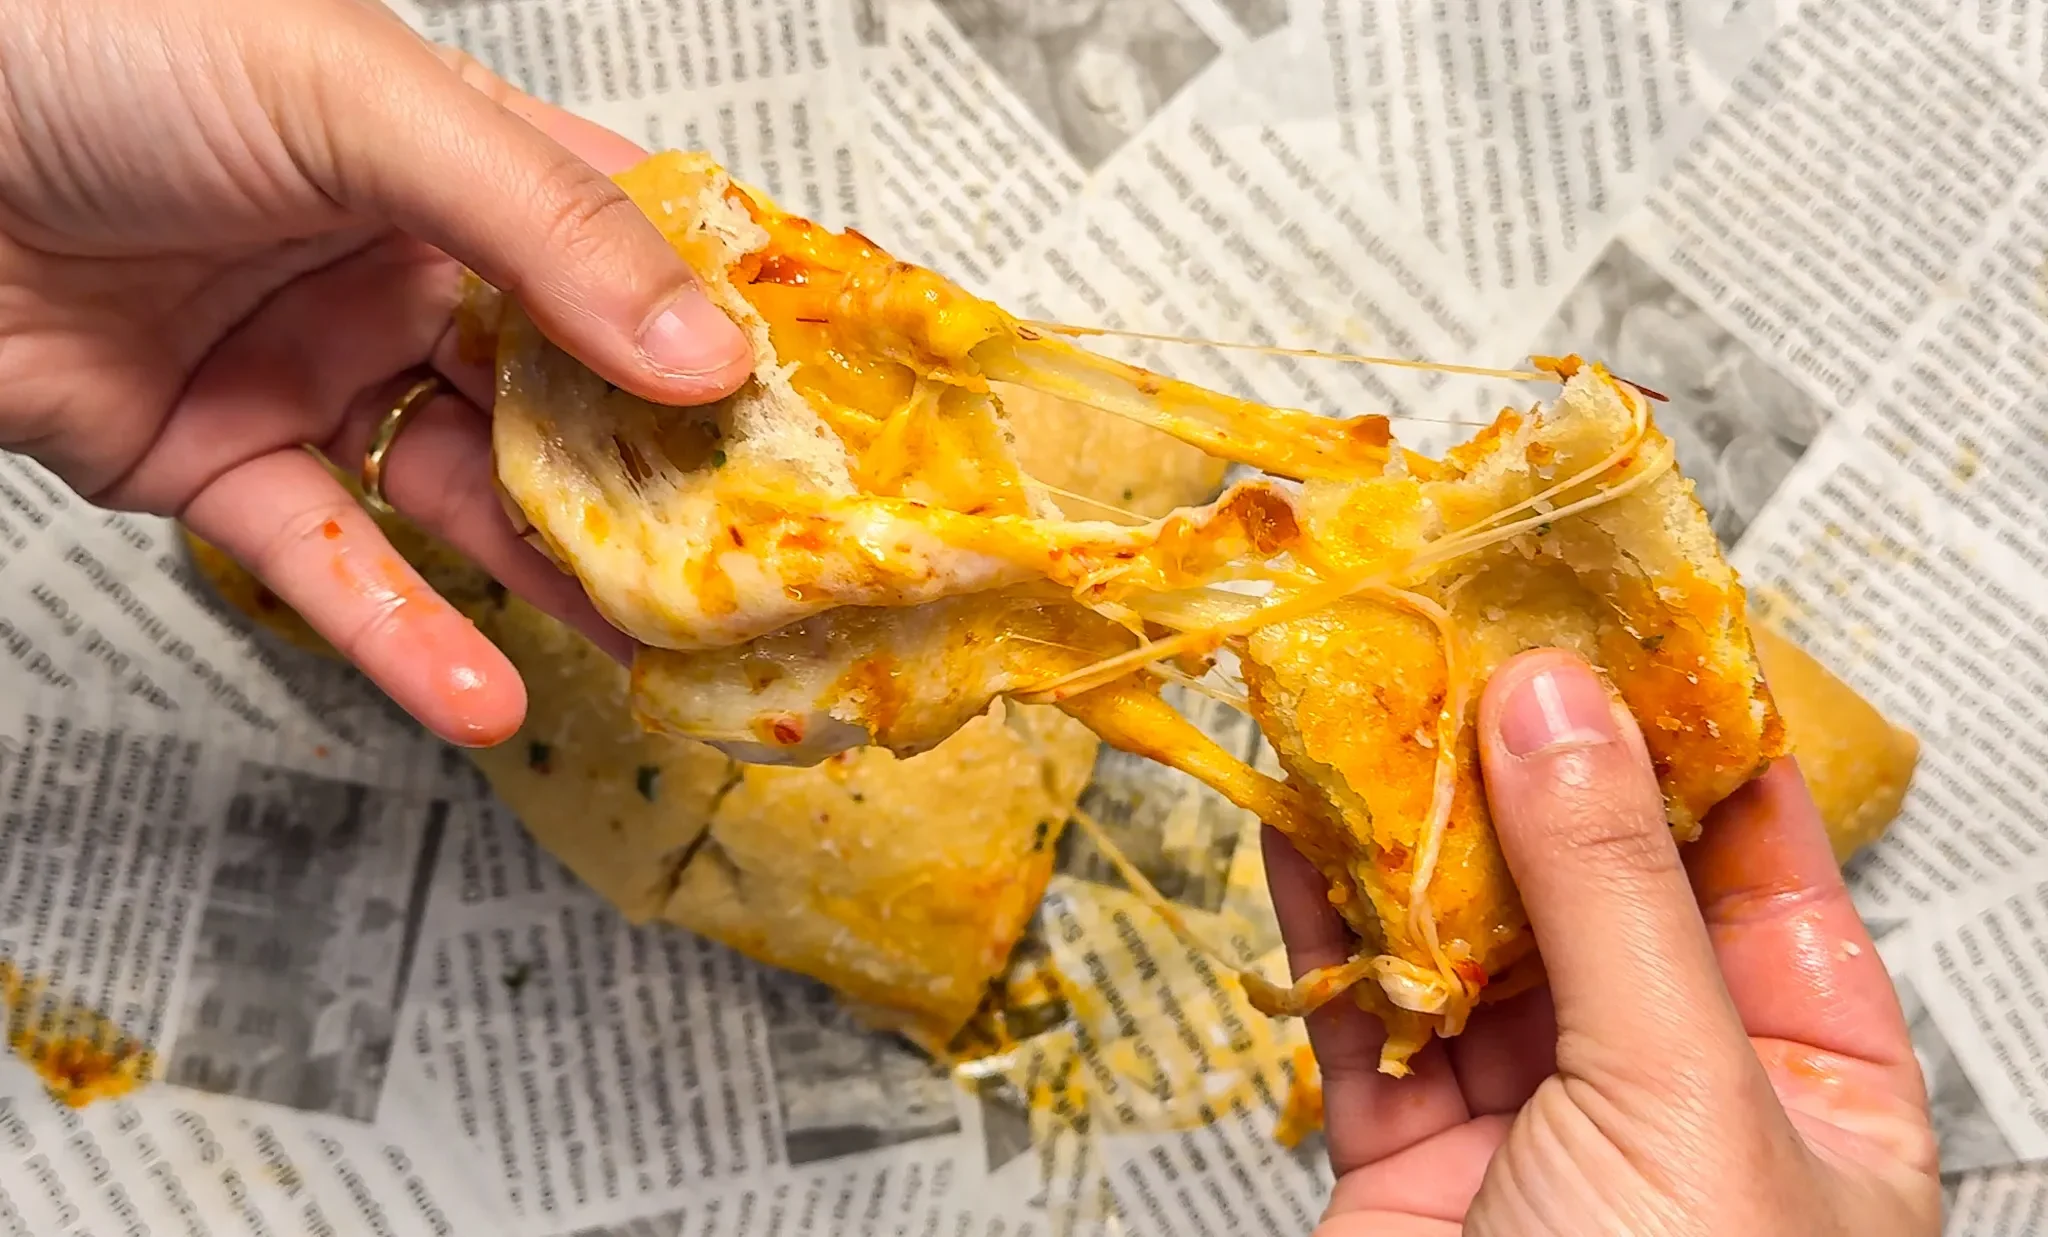
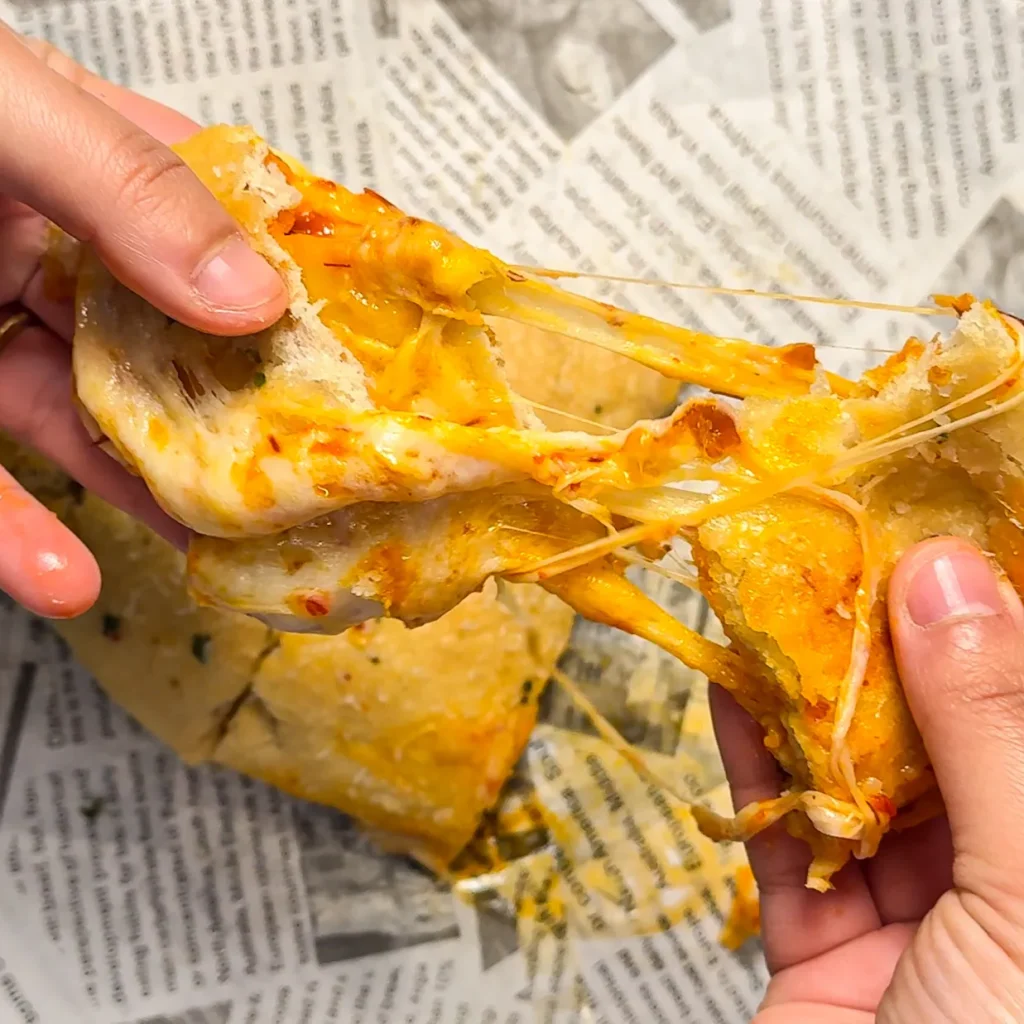
Mozzarella has a relatively low melting point and becomes very liquid when exposed to oven heat. If the dough seal around the cheese filling is not airtight, the molten cheese will find any gap and pour out during baking, leaving you with a dry interior and a messy tray. The two-centimeter border and firm pinching technique described in the instructions below are specifically designed to prevent this. The cheese needs to be contained for the bread to work.
")
Choosing the Right Ingredients
Flour
Standard all-purpose flour with a protein content of around 10 to 12 percent is ideal. Higher-protein bread flour will make the dough tougher to stretch without tearing, which can make the filling step more frustrating. If bread flour is all you have, add an extra teaspoon of olive oil to compensate for the increased strength.
Yeast
Instant yeast is the most reliable option for this recipe. If you only have active dry yeast, dissolve it in the warm water first with a pinch of the sugar and wait five minutes until it foams before adding it to the flour. The amounts remain the same; only the process changes.
Mozzarella Cheese
This is the most important ingredient in cheesy stuffed bread, and it deserves careful selection. Low-moisture, whole-milk mozzarella is the correct choice — it melts smoothly, stretches beautifully, and does not release excessive water into the dough during baking. Fresh mozzarella, while delicious, has a high moisture content and can make the interior soggy. Pre-shredded mozzarella is coated in anti-caking agents that inhibit melting — always shred your own from a block for the best cheese pull. In my testing, the difference between shredding fresh from a block versus using pre-shredded is immediately visible in the finished product.
Butter and Aromatics
Unsalted butter gives you control over the final seasoning. After baking, you will melt the butter and add garlic powder and dried oregano before brushing. Use good-quality butter — it is the last thing that touches the bread and the first flavor you taste.
")
Step-by-Step Instructions
Preparation
Begin by combining the dry ingredients in a large bowl: 315 grams of all-purpose flour, 3 grams of instant yeast, 5 grams of sugar, and 6 grams of salt. Mix them briefly with a fork or whisk to distribute the yeast and salt evenly. In a separate small bowl or measuring cup, combine 220 grams of warm water and 15 grams of olive oil. The water temperature should feel comfortably warm against your wrist — approximately 38 to 40 degrees Celsius. Water that is too hot will kill the yeast; water that is too cold will slow the fermentation significantly.
Making and Rising the Dough
Pour the wet ingredients into the dry and mix until a shaggy dough forms. Turn it out onto a clean, lightly floured surface and begin kneading. Push the dough away from you with the heel of your hand, fold it back on itself, rotate it a quarter turn, and repeat. Continue for 8 to 10 minutes until the dough is smooth, soft, and only very slightly tacky.
If it sticks aggressively to the counter, dust with a little more flour — but add it sparingly, as too much flour will make the finished bread dense. Shape the dough into a ball, place it in a lightly oiled bowl, cover with a clean kitchen towel or plastic wrap, and leave it in a warm spot to rise for 45 to 60 minutes, or until doubled in size.
Filling and Shaping
Preheat your oven to 220 degrees Celsius (430 degrees Fahrenheit) while the dough finishes rising. Lightly flour your work surface and gently deflate the risen dough by pressing it down with your fingers. Use a rolling pin to roll it into a rectangle approximately 30 by 20 centimeters and 1 to 1.5 centimeters thick. Scatter your mozzarella filling evenly across the surface of the dough, leaving a 2 to 3 centimeter border clear around all four edges.
This border is essential — it gives you clean dough to fold and seal. Carefully fold the long sides of the dough over the filling toward the center, then press the seam firmly and pinch it shut. Tuck and seal the short ends the same way. Place the loaf seam-side down on a baking tray lined with parchment paper.
Baking and Finishing
Slide the tray into the preheated oven and bake for 15 to 20 minutes, until the top is deep golden brown and the underside sounds hollow when tapped. The internal temperature of the bread should reach at least 88 to 90 degrees Celsius. While it bakes, melt 30 grams of unsalted butter and stir in half a teaspoon of garlic powder and a generous pinch of dried oregano. The moment the bread comes out of the oven, brush this butter mixture all over the top and sides. Let the cheesy stuffed bread rest for 5 minutes before slicing — this brief rest allows the cheese to set slightly so it does not flood out when cut.
")
Professional Tips for Perfect Results
Knead Until the Dough Is Truly Smooth
The most common mistake with cheesy stuffed bread is under-kneading the dough. A properly kneaded dough should feel silky and elastic, like an earlobe. If it still feels rough or tears easily when stretched, keep going. The few extra minutes of kneading are worth it for the structural integrity that keeps the cheese inside where it belongs.
Use Room-Temperature Cheese
Cold cheese from the refrigerator does not melt as evenly during the relatively short baking time. Pull your mozzarella out 20 to 30 minutes before you plan to fill the dough. Room-temperature cheese melts more uniformly, which means no pockets of unmelted cheese and a more consistent texture throughout. This is one of those small adjustments that makes a noticeable difference in the finished product.
Score the Top Before Baking
Once your cheesy stuffed bread is on the baking tray, use a sharp knife or bread lame to make 8 to 10 shallow diagonal cuts across the top of the loaf. These scores serve two purposes: they create natural pull-apart lines that make serving easier, and they allow steam to escape during baking in a controlled way, which reduces the risk of the dough bursting at the seams. Do not cut all the way through — just break the surface. If you enjoy pull-apart bread styles, the Garlic Cheese Pull Apart Bread on the site uses a similar technique with a slightly different presentation.
Brush the Butter Immediately
The butter finishing step only works properly when done on a hot loaf. The heat from the bread helps the butter spread and absorb into the crust rather than sitting on the surface. If you wait until the bread cools, the butter will sit in a film on top rather than melding into the crust. Immediate brushing is the secret to that glossy, rich, Domino’s-style exterior.
Rest Before Cutting
Five minutes is all it takes. Cutting into cheesy stuffed bread immediately after it comes out of the oven will cause all the molten cheese to run out at once, leaving the interior dry. The brief rest period allows the cheese to thicken just enough to stay in place when sliced, giving you that dramatic pull when you separate the pieces.
")
Common Mistakes to Avoid
Not Sealing the Dough Properly
This is by far the most common failure point. The seal needs to be firm, consistent, and airtight. Run your fingertips along the entire seam and check for any gaps or thin spots. Any opening will become an exit point for the melted cheese. If you notice a weak spot, press it firmly and pinch again. Placing the loaf seam-side down on the baking tray adds extra security because the weight of the bread helps hold the seal closed during baking.
Overfilling the Bread
More cheese feels like more reward, but too much filling creates too much internal pressure during baking. When the cheese melts and expands, an overfilled loaf will blow out its seams regardless of how carefully you sealed it. A moderate, even layer of mozzarella — covering the dough without piling up — is the correct approach. Restraint at the filling stage pays off at the slicing stage.
Skipping the Rise
The 45 to 60 minute rise is not optional. It is what gives the bread its light, airy texture. Skipping or shortcutting the rise results in a dense, bready loaf with a tight crumb and no room for the cheese to be cradled naturally within the structure. Give the dough time to do its job.
Using the Wrong Cheese
Mozzarella is non-negotiable for authentic cheesy stuffed bread. Cheddar and gouda can be used as additions, but a cheddar-only filling will not produce the same stretchy, pull-apart texture because cheddar melts differently. If you want a bolder flavor, add 20 to 30 percent sharp cheddar to your mozzarella blend — but keep mozzarella as the base.
Variations to Try
Pepperoni Cheesy Stuffed Bread
Scatter sliced pepperoni over the mozzarella before folding the dough. The pepperoni crisps slightly during baking and adds a salty, fatty richness that makes this variation taste exactly like a calzone from a good Italian pizzeria. A light brush of tomato paste over the dough before adding the cheese adds another layer of flavor. If you love the pepperoni-cheese combination, the Pepperoni Garlic Bread on the site is a close cousin worth making alongside this recipe.
Pepper Paste Cheesy Stuffed Bread
This is the version mentioned in the original recipe — and it is outstanding. Combine one tablespoon of red pepper paste with one teaspoon of olive oil and mix it through the shredded mozzarella before using it as your filling. The result is a slightly spicy, deeply savory loaf with a beautiful reddish tinge visible at the edges when sliced. This variation works particularly well served alongside pasta dishes or thick soups.
Herb and Garlic Cheesy Stuffed Bread
Mix two teaspoons of dried Italian herbs and two cloves of finely minced fresh garlic through the mozzarella. The herbs infuse into the cheese during baking and create a fragrant, aromatic filling that perfumes the entire kitchen. You can also stir fresh herbs like parsley or basil into the butter finish for an additional layer of brightness. For an elevated version of this concept, the Truffle Garlic Bread offers a luxurious take on the garlic-cheese-bread combination.
Triple Cheese Cheesy Stuffed Bread
Combine equal parts mozzarella, sharp cheddar, and provolone for a richer, more complex filling. The cheddar adds sharpness and color, the provolone adds nuttiness, and the mozzarella provides the melt and stretch. This variation is the best choice for entertaining, as the three-cheese combination is visually dramatic when sliced.
Storage and Reheating
Room Temperature
Cheesy stuffed bread can be stored at room temperature, loosely wrapped in foil or parchment, for up to one day. After that, the dough begins to dry out and the cheese loses its pleasant texture. For best results, eat it the day it is made.
Refrigeration
Store leftover cheesy stuffed bread in an airtight container in the refrigerator for up to three days. The dough will firm up and the cheese will solidify, but proper reheating restores most of the original texture.
Freezing
Cheesy stuffed bread freezes well once fully baked and cooled. Wrap individual slices or the entire loaf tightly in plastic wrap followed by a layer of aluminum foil. Freeze for up to one month. Thaw overnight in the refrigerator before reheating.
Reheating
The oven is the only proper tool for reheating cheesy stuffed bread. Preheat to 175 degrees Celsius (350 degrees Fahrenheit), place the bread directly on the oven rack or on a baking sheet, and heat for 8 to 10 minutes until warm throughout and the crust is slightly crisped again. The microwave softens the crust irreversibly and is not recommended. A quick pass under the broiler for the last 90 seconds adds welcome crispness to the top.
Frequently Asked Questions
Can I make cheesy stuffed bread ahead of time?
Yes. You have two good options. First, you can make the dough the night before, shape it, place it on a baking tray, cover tightly with plastic wrap, and refrigerate it before the final rise. The cold slows the yeast activity and the dough will rise slowly overnight. Bring it to room temperature for 20 minutes before baking. Second, you can bake the loaf completely, cool it, wrap it well, and store it until needed — then reheat in the oven as described above.
Can you freeze cheesy stuffed bread?
Yes, absolutely. Bake and cool the bread fully before freezing. Wrap it tightly in plastic wrap and then foil to prevent freezer burn. It will keep for up to one month in the freezer. Thaw overnight in the refrigerator and reheat in a 175-degree oven for 10 to 12 minutes. Freezing the dough raw is possible but less reliable, as the yeast can be damaged by the freezing process.
What is the best cheese for stuffed bread?
Low-moisture, whole-milk mozzarella is the gold standard for cheesy stuffed bread. It melts evenly, stretches dramatically, and does not release water that would make the dough soggy. For more flavor complexity, combine mozzarella with provolone (for nuttiness) or sharp cheddar (for tang). Always shred your own cheese from a block — the anti-caking agents on pre-shredded cheese prevent proper melting.
Why does my cheese leak out during baking?
The cheese leaks when the dough seal is not tight enough, when the oven temperature is too low (the dough expands slowly and cracks before setting), or when the bread is overfilled. Press the seam firmly on all sides, place it seam-side down, use a properly preheated oven at 220 degrees Celsius, and use a moderate amount of filling — these four steps together eliminate nearly all leaking.
How do I know when the cheesy stuffed bread is fully baked?
The crust should be a deep golden brown on top and a lighter golden color underneath. The loaf should feel firm when gently pressed — a hollow sound when tapped on the bottom is another reliable indicator. If you have a kitchen thermometer, the internal temperature should read at least 88 to 90 degrees Celsius (190 to 195 degrees Fahrenheit) in the thickest part of the loaf.
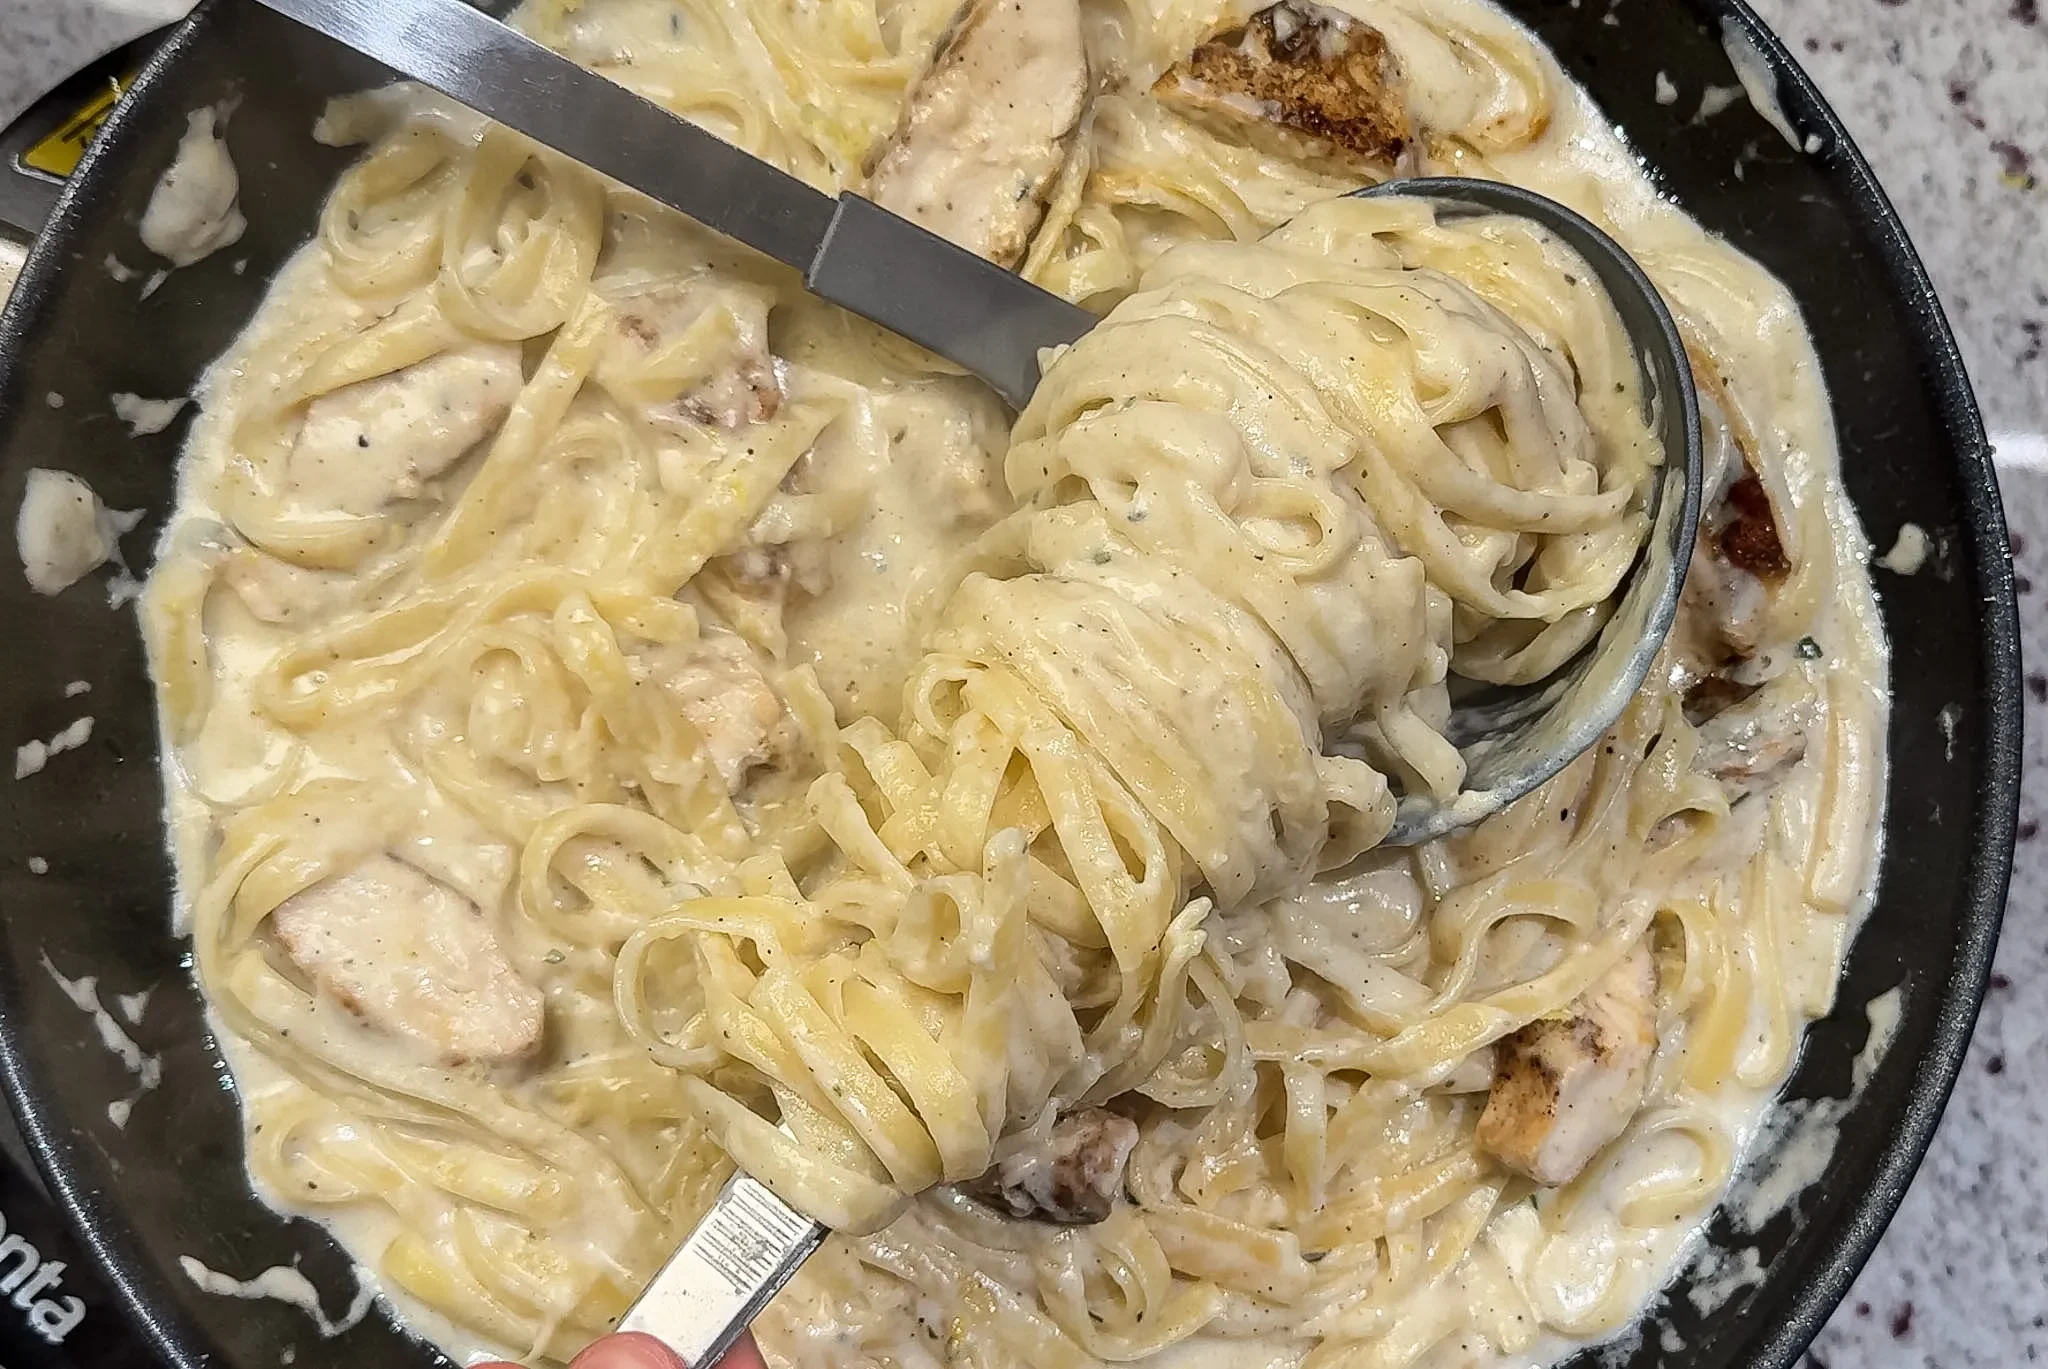
What should I serve with cheesy stuffed bread?
Cheesy stuffed bread is a natural partner for marinara sauce, garlic dipping butter, ranch dressing, and spicy mayo. It pairs beautifully with pasta dishes, thick soups like broccoli cheddar or tomato bisque, and green salads. It also works well as the centerpiece of a sharing platter alongside cured meats and olives for a relaxed, crowd-pleasing appetizer spread.
Watch the recipe video for more clarity!
See our similar recipes:
People also like these recipes:
Final Thoughts
Cheesy stuffed bread is one of those recipes that feels like a treat every single time you make it, even though the process is genuinely simple once you have done it once. The satisfaction of pulling apart a loaf you made yourself — watching the cheese stretch and smelling the garlic butter on the warm crust — is something delivery simply cannot replicate. Now that you know how the dough works, how the cheese behaves under heat, and what to do if things go wrong, this cheesy stuffed bread is yours to make whenever the craving hits.
I hope the tips and techniques in this guide give you the confidence to make it on a weeknight just as easily as you would on a weekend. Start with the classic mozzarella version to get a feel for the dough and the sealing technique, then experiment with the pepperoni or triple-cheese variations once you are comfortable. Each batch of cheesy stuffed bread will be a little better than the last as the process becomes second nature.
This recipe earns a permanent place in any home baker’s rotation. It is easy enough for beginners, satisfying enough for experienced bakers who want a quick win, and impressive enough to share. Whether it is on the table alongside a bowl of pasta or disappearing piece by piece at a gathering, this cheesy stuffed bread always delivers exactly what it promises.
Dough
- 315 g flour
- 3 g instant yeast
- 5 g sugar
- 6 g salt
- 15 g olive oil
- 220 g warm water
Filling
- 220 g mozzarella
- 30 g pepper paste
- 10 g olive oil
- 200 g mozzarella
Finish
- 20 g melted butter
- garlic powder
oregano
Mix flour, yeast, sugar, and salt.
Add olive oil and warm water, mix into dough.
Knead 8–10 minutes until smooth and soft.
Let rise 45–60 minutes until doubled.
Roll into rectangle.
Add filling, leaving border.
Fold and seal tightly.
Bake at 220°C for 15–20 minutes.
Brush with butter and season.
Rest 5 minutes, slice, and serve.
If you've given this recipe a try and it won you over, please share your thoughts by leaving
a rating and comment below! If you have any questions about this recipe, don't hesitate to ask – I'm here to
help and will respond promptly.