Discover the Magic of Italian Breaded Chicken
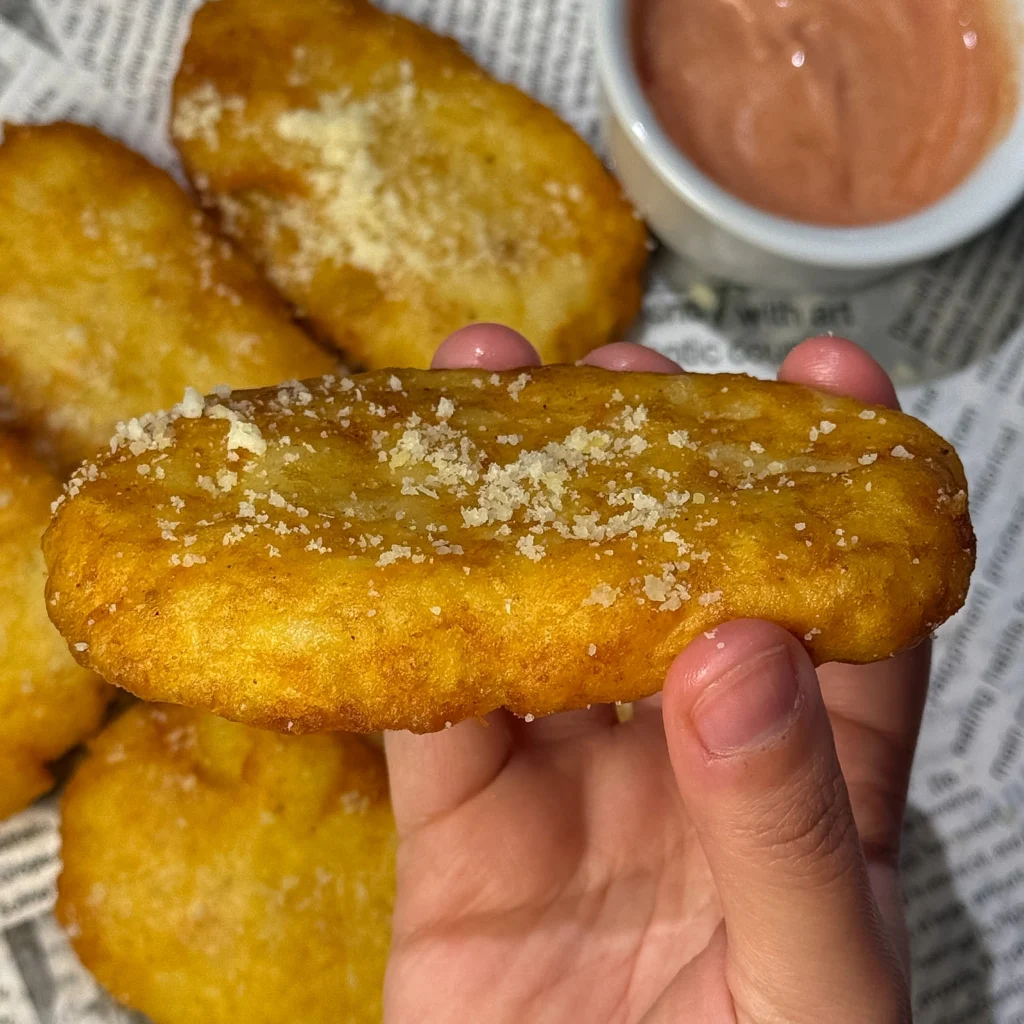
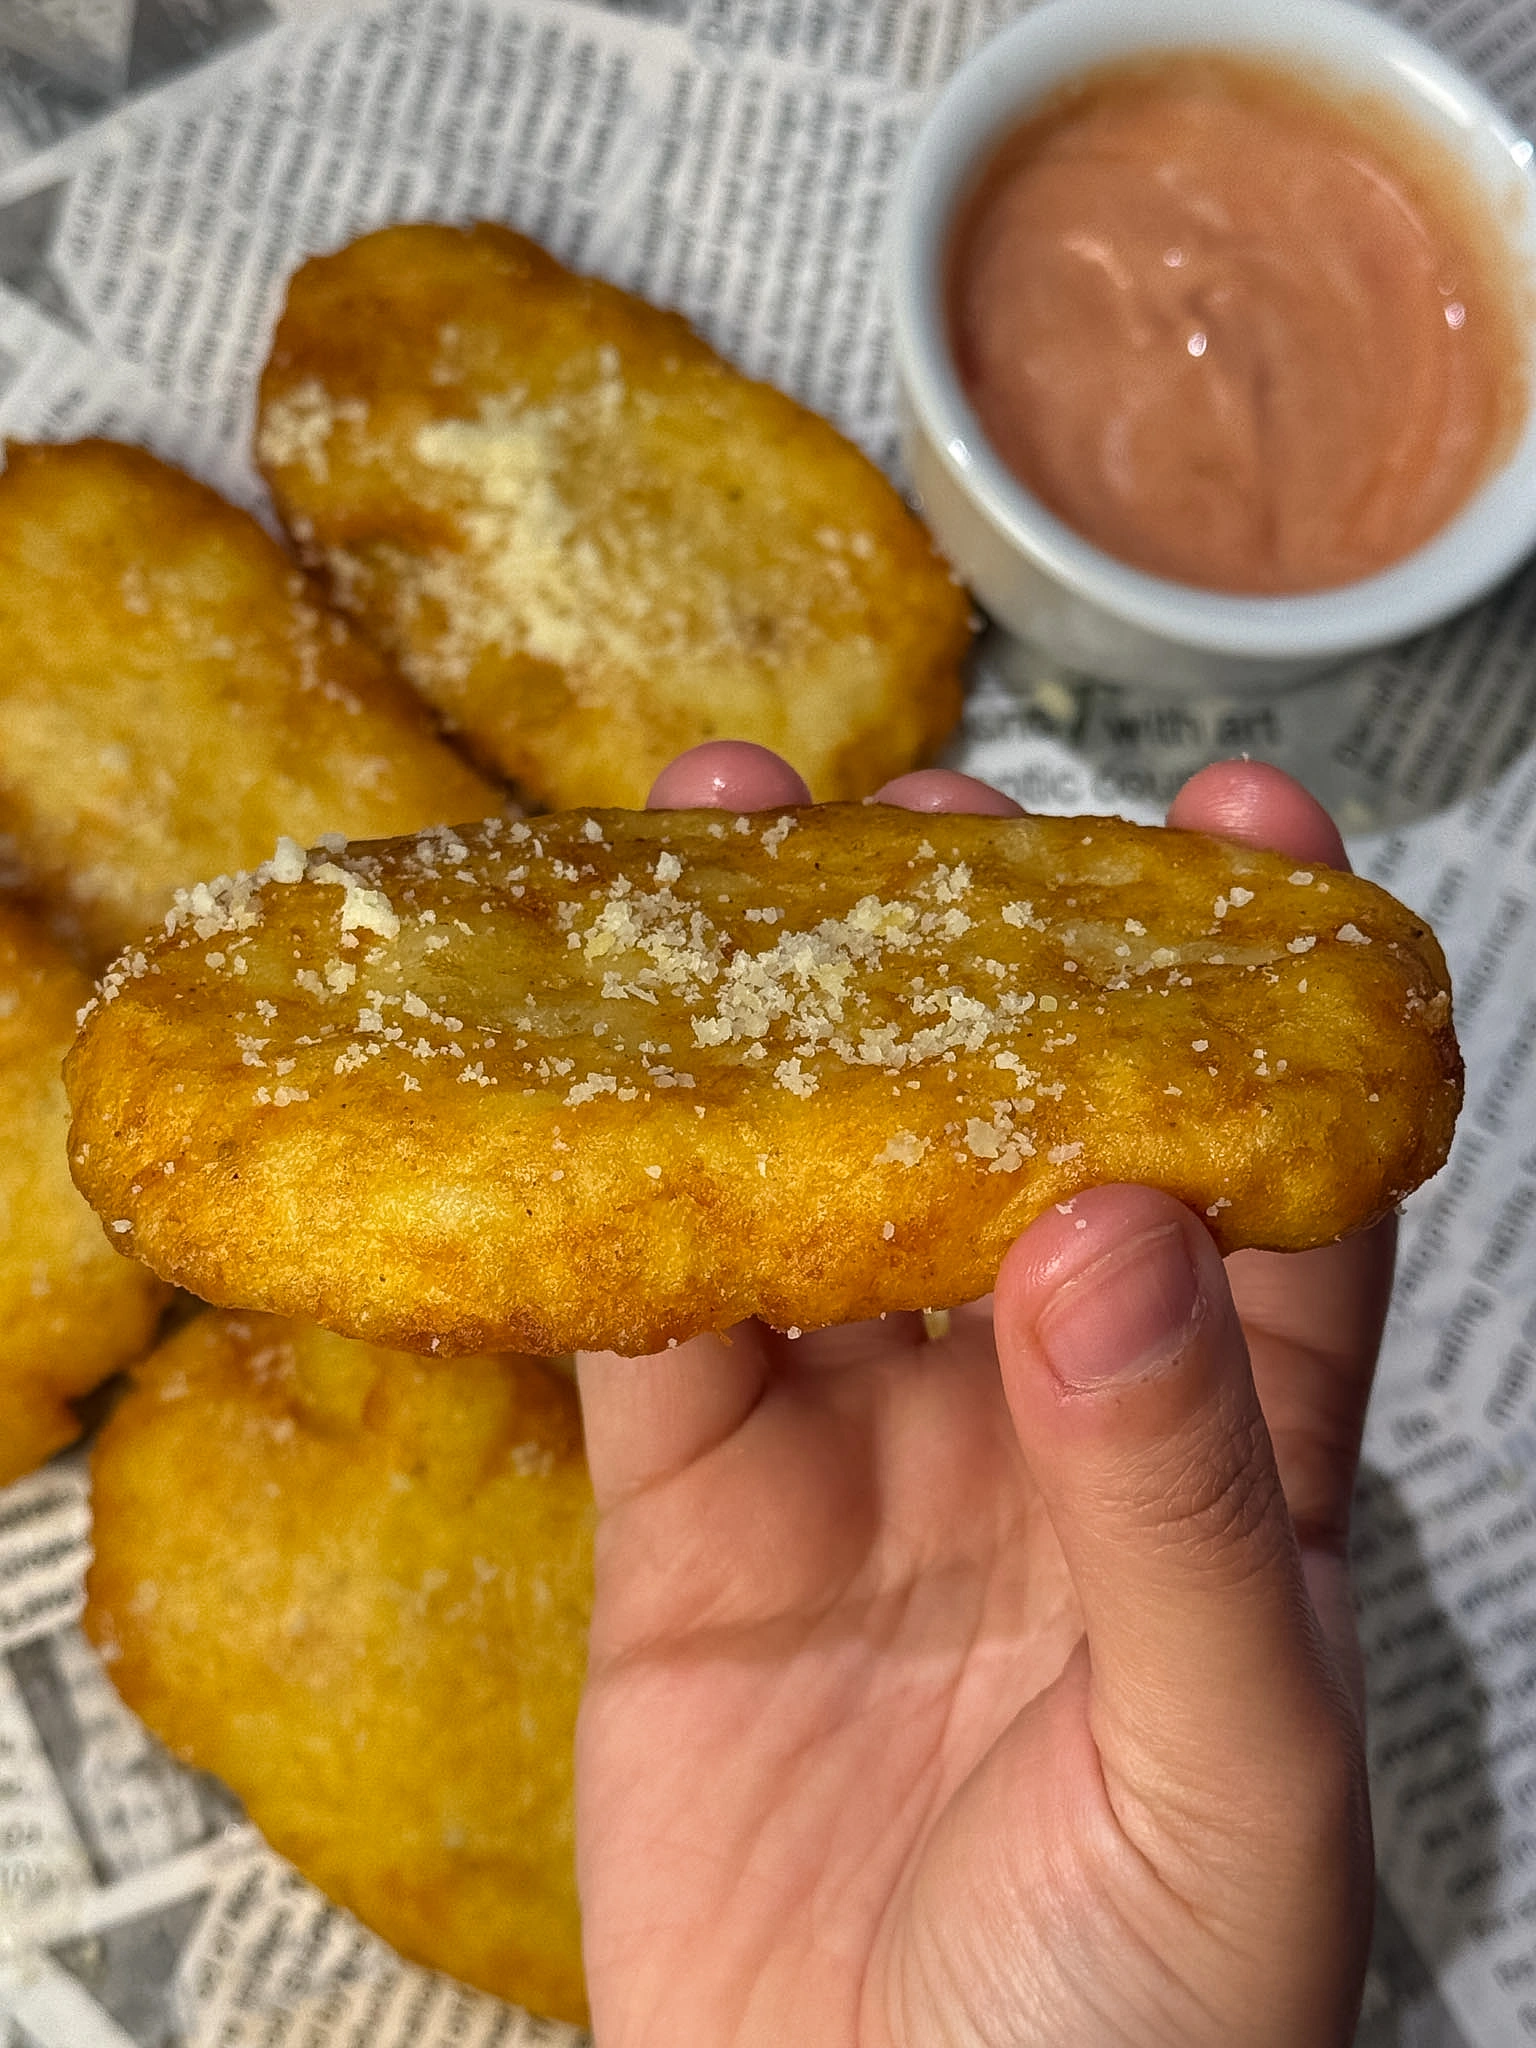
Experience the ultimate delight with our Crispy Italian Breaded Chicken – a culinary masterpiece that promises to redefine your taste buds and transform ordinary dinners into extraordinary experiences! Delicate slices of chicken breast are coated in a meticulously crafted blend of seasoned breadcrumbs, creating homemade perfection that surpasses anything you’ll find at a restaurant. The magic unfolds as these cutlets are expertly pan-fried in oil, resulting in an irresistibly crispy texture and an explosion of flavor that will leave you savoring every single bite.
This Italian Breaded Chicken recipe represents comfort food at its finest, combining the simplicity of basic ingredients with techniques that yield professional results. Each cutlet emerges from the pan golden brown and impossibly crispy on the outside while remaining tender and juicy inside. The secret lies in the triple-layer breading process combined with paper-thin chicken that cooks quickly without drying out. These cutlets are so versatile they work as main courses, sandwich fillings, or sliced over salads for lighter meals.
What makes this Italian Breaded Chicken truly special is the homemade seasoned breadcrumb mixture that far surpasses store-bought Italian breadcrumbs. By creating your own blend of herbs, spices, and premium cheeses, you control both flavor and quality. The addition of grated Parmesan and Pecorino Romano in both the egg wash and breadcrumb coating creates layers of savory, nutty flavor that permeate every bite. This attention to detail transforms simple chicken cutlets into something memorable.
Why This Recipe Works
Perfect for beginners yet impressive enough for experienced cooks, this Italian Breaded Chicken recipe holds nostalgic charm for many home cooks who discovered these delightful cutlets early in their cooking journey. Unlike store-bought Italian breadcrumbs that often taste flat and overly salty, our version features homemade seasoned breadcrumbs that add an extra layer of crispiness and authentic cheesy goodness you can taste in every bite.
The secret to success lies in pounding the chicken super thin, ensuring quick and thorough cooking in the pan without needing an oven finish. This technique guarantees that the breading reaches perfect golden crispiness at the exact moment the chicken cooks through completely. Seasoning each piece of chicken before breading enhances juiciness and infuses the meat with bursts of flavor that complement the crispy coating beautifully.
For that extra touch of indulgence, we elevate the breading experience by incorporating grated cheese directly into the egg mixture. This innovative step creates a culinary triumph that guarantees perfect balance of texture and taste in every mouthwatering bite of Italian Breaded Chicken. The cheese in the egg wash acts as additional glue for breadcrumbs while contributing rich, savory flavor.
Key Ingredients Overview
Creating exceptional Italian Breaded Chicken starts with selecting quality ingredients that work together harmoniously. Boneless, skinless chicken breasts provide the lean protein base that becomes tender when pounded thin. Homemade breadcrumbs or quality Panko create the crispy exterior coating that defines this dish. Premium grated cheeses including Parmesan and Pecorino Romano contribute nutty, salty depth.
Fresh eggs bind the coating layers together while adding richness. All-purpose flour creates the foundational layer that helps subsequent coatings adhere. A carefully balanced blend of Italian herbs and spices including garlic powder, dried parsley, Italian seasoning, oregano, and thyme builds complex, authentic flavor. Frying oil creates the hot environment needed for achieving that signature golden, crispy exterior.

Understanding Italian Breaded Chicken
Italian Breaded Chicken, known as “cotoletta” or “scaloppine” in Italian cuisine, represents a cooking technique that transforms simple chicken breast into something extraordinary. Understanding the principles behind proper breading and frying helps you achieve restaurant-quality results at home. This classic preparation method creates textural contrast between crispy coating and tender meat that makes every bite satisfying.
The success of Italian Breaded Chicken depends on mastering three key elements: preparing chicken to optimal thickness, creating adhesive breading layers that stay attached during frying, and maintaining proper oil temperature for crispy results without greasiness. When executed properly, these cutlets emerge golden brown and crunchy with juicy, flavorful chicken inside.
The Science of Breading
The triple-layer breading system used for Italian Breaded Chicken creates maximum adhesion and crunch. Flour forms the base layer, creating a dry surface that egg wash clings to effectively. The egg wash acts as glue, providing a sticky surface for breadcrumbs to attach. Breadcrumbs create the final textured layer that crisps beautifully when fried.
Each layer serves a specific scientific purpose in the coating architecture. Flour absorbs surface moisture from chicken, allowing egg proteins to bond directly to the meat. Egg proteins denature and coagulate when heated, essentially cementing breadcrumbs in place. Breadcrumbs provide surface area and texture that becomes crispy through moisture evaporation and the Maillard reaction during frying.
The Importance of Thin Chicken
Pounding chicken breast to approximately half-inch thickness is crucial for perfect Italian Breaded Chicken. Thin cutlets cook through quickly, reaching safe internal temperature before the breading burns. This timing ensures the exterior achieves beautiful golden color and crispiness at the exact moment the interior becomes fully cooked and juicy.
Thin chicken also provides better ratio of crispy coating to tender meat in each bite. Thick chicken pieces require longer cooking that often results in burned breading or undercooked centers. The pounding process also tenderizes the meat by breaking down muscle fibers, creating more tender results even from budget-friendly chicken breasts.
Choosing the Right Ingredients
Every ingredient in Italian Breaded Chicken plays a specific role in creating the final flavor and texture. Selecting quality components ensures the best possible results. While some substitutions work based on availability, certain elements are essential to maintaining authenticity and achieving that perfect crispy coating.
Understanding why each ingredient matters helps you make informed choices and troubleshoot if something goes wrong during preparation.
Chicken Selection
Boneless, skinless chicken breasts are ideal for Italian Breaded Chicken because they provide lean, neutral-flavored protein that showcases the seasoned breading. Select chicken breasts that are similar in size for even cooking. Fresh chicken works best, though properly thawed frozen chicken breasts are acceptable.
You can purchase whole chicken breasts and slice them horizontally yourself, or buy pre-sliced chicken breast cutlets to save time. If slicing yourself, partially freezing chicken for 20 to 30 minutes makes it firmer and easier to cut evenly. Regardless of starting point, plan to pound all pieces to uniform half-inch thickness for consistent Italian Breaded Chicken results.
Breadcrumb Options
Homemade breadcrumbs made from day-old bread create the most authentic Italian Breaded Chicken with superior flavor and texture. Process dried bread in a food processor until fine crumbs form. Alternatively, unseasoned Panko breadcrumbs offer excellent results with their light, airy texture that creates exceptionally crispy coating.
Panko’s larger, flakier structure provides more surface area for crisping than traditional fine breadcrumbs. This creates lighter, crunchier Italian Breaded Chicken that stays crispy longer. Avoid pre-seasoned Italian breadcrumbs, which often contain excessive salt and inferior dried herbs that taste artificial. Creating your own seasoning blend ensures fresher, more vibrant flavor.
Cheese Selection
Premium cheeses dramatically impact the final flavor of Italian Breaded Chicken. Parmigiano Reggiano is the gold standard, offering complex, nutty flavor and granular texture that integrates beautifully into breadcrumb coating. Grana Padano provides similar characteristics at slightly lower cost while maintaining excellent quality.
Pecorino Romano, made from sheep’s milk, contributes sharper, saltier flavor with distinctive tang. Traditional Italian Breaded Chicken often uses a combination of both Parmesan and Pecorino for layered flavor complexity. Whatever cheese you choose, buy wedges and grate them fresh rather than using pre-grated versions that contain anti-caking agents affecting texture.
Oil for Frying
The frying oil you choose affects both flavor and cooking performance of Italian Breaded Chicken. Neutral oils with high smoke points work best, including vegetable oil, canola oil, or peanut oil. These oils can reach the high temperatures needed for crispy frying without burning or smoking.
Olive oil can be used but choose regular or light olive oil rather than extra-virgin, which has a lower smoke point and strong flavor that can become bitter when heated. You need enough oil depth—approximately half inch—to properly fry Italian Breaded Chicken cutlets. Shallow frying uses less oil than deep frying while still achieving excellent crispy results.

Step-by-Step Instructions for Perfect Italian Breaded Chicken
Creating exceptional Italian Breaded Chicken requires following specific steps in the correct order. While the process is straightforward, attention to detail and proper technique ensures optimal results. Understanding why each step matters helps you execute the recipe confidently.
Organization is essential for breading success. Set up your breading station before starting to prevent messy interruptions or coating your fingers instead of the chicken.
Preparing Your Ingredients
Begin by setting up three shallow bowls or plates for your breading station. In the first bowl, place all-purpose flour seasoned with salt, pepper, garlic powder, and onion powder. Mix thoroughly to distribute seasonings evenly. In the second bowl, whisk together eggs with one tablespoon of water and a quarter cup of grated cheese until well combined and slightly frothy.
In the third bowl, combine breadcrumbs with remaining grated cheese, garlic powder, salt, pepper, dried parsley, Italian seasoning, oregano, and dried thyme. Mix thoroughly to distribute herbs and cheese evenly throughout the breadcrumbs. This preparation ensures smooth workflow when breading your Italian Breaded Chicken cutlets.
Pounding the Chicken
Place one chicken breast on a cutting board and cover it completely with plastic wrap. This prevents mess and keeps chicken from sticking to your mallet. Using a meat mallet or rolling pin, pound the chicken from the center outward, creating uniform half-inch thickness across the entire piece.
Pay special attention to the thick end of the breast, which requires more pounding than the thinner end. The goal is consistent thickness throughout so your Italian Breaded Chicken cooks evenly. Repeat this process for all chicken breasts, stacking pounded pieces on a plate. Uniform thickness is crucial for achieving perfectly cooked cutlets where breading and meat finish simultaneously.
Setting Up Your Breading Station
Arrange your breading station in logical order from left to right: pounded chicken, seasoned flour, egg mixture, seasoned breadcrumbs, and finally an empty plate for finished breaded cutlets. This assembly-line setup allows smooth workflow and prevents cross-contamination between stations.
Keep one hand designated for dry ingredients and the other for wet ingredients when possible. This “wet hand, dry hand” technique minimizes breading buildup on your fingers. Have a damp towel nearby for wiping hands between pieces. Proper station setup makes breading Italian Breaded Chicken efficient and significantly less messy.
The Breading Process
Take one pounded chicken cutlet and place it in the seasoned flour. Flip to coat both sides completely, pressing gently to ensure flour adheres. Shake off excess flour—too much creates gummy spots in your final coating. The flour layer should be thin and even across the entire surface.
Transfer the floured cutlet to the egg mixture, turning to coat both sides thoroughly. Allow excess egg to drip back into the bowl—too much egg makes breadcrumbs soggy. Finally, place the egg-coated cutlet in the breadcrumb mixture, pressing gently but firmly on both sides to ensure even, thorough coverage. The breadcrumbs should adhere in an even layer with no bare spots visible on your Italian Breaded Chicken.
Resting the Breaded Cutlets
Place each breaded cutlet on the reserved plate as you complete it. Once all cutlets are breaded, let them rest for 10 to 15 minutes at room temperature before frying. This resting period allows the breading layers to set and bond to the chicken, significantly reducing the risk of coating falling off during frying.
The moisture from egg wash partially hydrates the breadcrumbs and flour, creating better adhesion between layers. This short wait dramatically improves the quality of your Italian Breaded Chicken, making it worth the patience. You can prepare cutlets up to this point several hours ahead and refrigerate until ready to fry.
Frying to Perfection
Heat approximately half inch of oil in a large, heavy-bottomed skillet over medium-high heat. Test oil temperature by dropping a breadcrumb into it—the oil is ready when the breadcrumb sizzles immediately and browns within 30 seconds. Proper temperature is crucial for crispy Italian Breaded Chicken that’s not greasy.
Carefully place cutlets in the hot oil without crowding—cook only 1 to 3 pieces depending on pan size. Crowding lowers oil temperature and causes steaming rather than frying. Cook undisturbed for 3 to 4 minutes until the bottom turns deep golden brown. Flip carefully using tongs or a spatula and cook the second side for another 3 to 4 minutes until equally golden and chicken reaches 165°F internal temperature.
Draining and Serving
Transfer cooked Italian Breaded Chicken to a wire rack set over a baking sheet or to a plate lined with paper towels. The rack method is superior because it allows air circulation underneath, preventing the bottom from becoming soggy. Let cutlets drain for a minute or two while you fry the next batch.
Serve immediately for maximum crispiness, or keep warm in a 250°F oven for up to one hour before serving. The low oven temperature maintains warmth without continuing to cook the chicken or making breading soggy. Italian Breaded Chicken is best enjoyed fresh and hot when the coating is at peak crispiness.
Professional Tips for Outstanding Results
Mastering Italian Breaded Chicken involves understanding subtle techniques that separate good from exceptional. These professional insights help you achieve restaurant-quality results at home every time you prepare this dish.
Attention to small details makes a significant difference in the final quality and appearance of your cutlets.
Temperature Management
Maintaining proper oil temperature throughout cooking ensures crispy Italian Breaded Chicken that’s not greasy. If oil is too cool, breading absorbs excess oil and becomes soggy. If too hot, breading burns before chicken cooks through. Medium-high heat typically works well, though you may need to adjust based on your stove.
Use a thermometer to monitor oil temperature, aiming for 350°F to 375°F. Between batches, allow oil to return to proper temperature before adding more cutlets. Remove any loose breadcrumbs floating in the oil, as they burn and create bitter flavor. Temperature control is perhaps the single most important factor in achieving perfect Italian Breaded Chicken.
Preventing Soggy Breading
Several factors contribute to soggy Italian Breaded Chicken breading. Excess moisture on chicken prevents proper flour adhesion—pat cutlets completely dry before breading. Too much flour or egg creates thick, gummy layers rather than thin, crispy ones. Crowding the pan traps steam and prevents proper crisping.
After frying, proper draining is essential. A wire rack allows air circulation on all sides, maintaining crispiness better than paper towels alone. Avoid stacking hot cutlets, which traps steam and makes breading soggy. These attention to detail dramatically improves the texture of your Italian Breaded Chicken.
Achieving Even Golden Color
Beautiful, even golden-brown color makes Italian Breaded Chicken visually appealing. Ensure breadcrumb coating is uniform thickness with no thick or thin spots. Press breadcrumbs firmly onto cutlets during breading to create cohesive coating that browns evenly.
Don’t move cutlets around in the pan once you place them—let them cook undisturbed to develop proper color. Flip only once halfway through cooking. If some areas brown faster than others, your oil may have hot spots. Adjust heat or rotate the pan occasionally. Even color indicates even cooking and creates professional-looking Italian Breaded Chicken.
Keeping Breading Attached
Nothing is more frustrating than breading that falls off during frying. Several techniques ensure breading stays attached to your Italian Breaded Chicken. First, make sure chicken is completely dry before starting. Pat with paper towels if needed. Second, press flour, egg, and breadcrumbs firmly onto chicken at each stage.
Allow breaded cutlets to rest before frying so layers bond together. Don’t flip cutlets until the first side is properly browned and releases easily from the pan—premature flipping tears breading. Use gentle handling with tongs or spatula rather than aggressive flipping. These techniques keep your Italian Breaded Chicken coating intact and beautiful.
Common Mistakes to Avoid
Even straightforward recipes like Italian Breaded Chicken have potential pitfalls that can compromise your results. Understanding these common mistakes helps you avoid them and achieve perfect cutlets every time.
Learning what not to do is just as valuable as learning proper technique when mastering any new recipe.
Using Chicken That’s Too Thick
The most common mistake is failing to pound chicken thin enough. Thick cutlets require longer cooking time that burns breading before chicken cooks through. The ideal thickness for Italian Breaded Chicken is approximately half inch—thin enough to cook quickly but thick enough to remain juicy.
Take time to pound chicken evenly to consistent thickness throughout each piece. Check thickness by eye and feel, pounding more where needed. This simple step makes the difference between mediocre and excellent Italian Breaded Chicken. Don’t skip or rush this crucial preparation.
Overcrowding the Pan
Crowding too many cutlets into the pan at once lowers oil temperature dramatically, resulting in greasy, soggy Italian Breaded Chicken instead of crispy cutlets. Each piece needs space around it for proper heat circulation and oil contact. Crowding also makes flipping difficult and increases the chance of breading falling off.
Cook cutlets in batches, typically 1 to 3 pieces depending on pan size. Yes, this takes longer, but the superior results are worth the extra time. Keep finished cutlets warm in a low oven while you fry remaining batches. Patience during frying produces consistently excellent Italian Breaded Chicken.
Using Pre-Grated Cheese
Pre-grated cheese seems convenient but contains anti-caking agents like cellulose that affect texture and flavor. These additives prevent cheese from integrating smoothly into breadcrumb coating, creating grainy texture in your Italian Breaded Chicken. Pre-grated cheese also tends to be drier with less flavor than freshly grated.
Take a few extra minutes to grate cheese fresh from a block. The improved flavor and texture make this small effort worthwhile. Freshly grated cheese melts better, adheres to chicken more effectively, and tastes noticeably superior in your finished Italian Breaded Chicken.
Skipping the Resting Period
Many cooks bread chicken and immediately start frying without allowing resting time. This impatience results in breading that’s more likely to fall off during cooking. The 10 to 15 minute rest allows egg wash to partially dry and breadcrumbs to adhere more firmly.
Use resting time to set up your frying station, heat the oil, or prepare sides. This brief wait significantly improves the quality of your Italian Breaded Chicken by ensuring coating stays intact during cooking. Don’t skip this step even when you’re rushed.
Not Monitoring Oil Temperature
Frying without monitoring oil temperature leads to inconsistent results. Oil that’s too cool produces greasy, pale Italian Breaded Chicken. Oil that’s too hot burns breading before chicken cooks through. Temperature fluctuates as you add cold chicken and between batches, requiring constant attention.
Use a thermometer to check oil temperature before adding each batch of cutlets. Adjust heat as needed to maintain 350°F to 375°F throughout frying. This attention to temperature ensures consistently crispy, golden, non-greasy Italian Breaded Chicken every single time.
Variations and Customizations
Once you’ve mastered basic Italian Breaded Chicken, exploring variations keeps the recipe exciting and allows personalization. These adaptations maintain the core technique while introducing new flavors or accommodating different preferences.
Experimenting with variations helps you understand the recipe’s flexibility and discover your perfect version of Italian Breaded Chicken.
Herb and Spice Variations
While the classic Italian herb blend works beautifully, experimenting with different seasonings creates unique flavor profiles. Add lemon zest to breadcrumbs for bright, fresh citrus notes. Include red pepper flakes for subtle heat. Try fresh herbs like basil or parsley mixed into breadcrumbs just before serving for vibrant color and flavor.
For Mediterranean variation, add dried oregano and a pinch of cinnamon. For French-inspired cutlets, use herbes de Provence instead of Italian seasoning. Smoked paprika adds depth and beautiful color to your Italian Breaded Chicken. These simple substitutions transform the dish while maintaining the crispy coating everyone loves.
Cheese Combinations
While Parmesan and Pecorino are traditional, other cheeses create interesting variations. Asiago offers nutty, sharp flavor similar to Parmesan with slightly sweeter notes. Romano provides sharp, salty punch. For milder Italian Breaded Chicken suitable for children, use all Parmesan or add mild mozzarella to the breadcrumb mixture.
Mixing multiple cheeses creates complexity—try two parts Parmesan to one part Pecorino for balanced flavor. Grana Padano provides similar characteristics to Parmigiano Reggiano at lower cost. Whatever cheese you choose, ensure it’s high quality and freshly grated for best results in your Italian Breaded Chicken.
Serving Suggestions
Italian Breaded Chicken is incredibly versatile and works in numerous preparations. Serve cutlets whole with lemon wedges and simple sides like roasted vegetables or salad. Slice cutlets and serve over pasta with marinara sauce for chicken Parmesan-style presentation without baking.
Layer cutlets on crusty rolls with lettuce, tomato, and mayonnaise for incredible chicken cutlet sandwiches. Slice cutlets thin and serve over Caesar salad for hearty main-course salad. Top cutlets with arugula, cherry tomatoes, and shaved Parmesan for elegant presentation. The possibilities are endless with perfect Italian Breaded Chicken.
Baked Version
For lower-fat Italian Breaded Chicken, try baking instead of frying. Bread cutlets as directed, then place on a wire rack set over a baking sheet. Spray breaded cutlets lightly with cooking spray or brush with olive oil. Bake at 425°F for 15 to 20 minutes, flipping halfway through, until golden brown and cooked through.
While baked cutlets won’t achieve quite the same crispy texture as fried, they’re still delicious and significantly healthier. The high oven temperature and wire rack allow air circulation for maximum crispiness. Baked Italian Breaded Chicken works wonderfully for meal prep and feeding large groups.
Protein Variations
The breading technique used for Italian Breaded Chicken works beautifully with other proteins. Try pork cutlets pounded thin for traditional Italian cotoletta. Veal cutlets create authentic Milanese-style preparation. Turkey cutlets offer leaner alternative with similar texture.
Fish fillets like tilapia or cod bread beautifully using this method, though cooking time is shorter. Even eggplant slices work for vegetarian version. The versatile breading technique transforms many proteins into crispy, flavorful dishes using the same principles that make Italian Breaded Chicken so successful.
Storage and Reheating
Proper storage extends the life of your Italian Breaded Chicken while maintaining quality as much as possible. Understanding correct storage and reheating techniques prevents food waste and ensures leftovers remain enjoyable.
While Italian Breaded Chicken tastes best when freshly fried and hot, leftovers can be quite good with proper handling.
Storing Guidelines
Allow leftover Italian Breaded Chicken to cool to room temperature before storing, but don’t leave it out longer than two hours for food safety. Place cutlets in an airtight container with parchment paper between layers to prevent sticking. Don’t stack them too tightly, as this makes breading soggy from trapped steam.
Refrigerate promptly and consume within 3 to 4 days for best quality and safety. The breading will lose some crispiness during storage, which is unavoidable with any fried food. However, proper reheating can restore much of the original texture. Store Italian Breaded Chicken separately from any sauces or toppings you plan to serve with it.
Reheating Methods
The oven method produces the best results when reheating Italian Breaded Chicken. Preheat your oven to 375°F and place cutlets on a wire rack set over a baking sheet. This setup allows hot air to circulate around cutlets, crisping both top and bottom. Heat for 10 to 15 minutes until warmed through and breading crisps up again.
Avoid microwaving Italian Breaded Chicken if possible, as microwaves create steam that makes breading hopelessly soggy and rubbery. If you must use a microwave, heat in short 20-second bursts and immediately transfer to a hot oven or toaster oven for a few minutes to crisp the exterior.
Air fryer reheating works excellently for Italian Breaded Chicken. Place cutlets in a single layer in the air fryer basket and heat at 375°F for 3 to 5 minutes until hot and crispy. This method closely replicates the original fried texture better than conventional oven reheating.
Freezing Instructions
Italian Breaded Chicken freezes reasonably well for convenient make-ahead meals. Freeze cutlets either before or after frying. To freeze uncooked breaded cutlets, place them on a baking sheet without touching and freeze until solid, then transfer to freezer bags. They’ll keep for up to 3 months.
Fry frozen breaded cutlets without thawing, adding 2 to 3 minutes to cooking time. Alternatively, freeze already-fried cutlets using the same flash-freezing method. Reheat frozen cooked cutlets in a 375°F oven for 15 to 20 minutes until hot throughout. While texture won’t be quite as perfect as fresh, frozen Italian Breaded Chicken is still delicious and incredibly convenient.
Frequently Asked Questions
These commonly asked questions address concerns and curiosities people have when preparing Italian Breaded Chicken. Understanding these details helps ensure success and builds confidence in the kitchen.
Can I bake instead of fry these cutlets?
Yes, Italian Breaded Chicken can be baked for healthier preparation. Place breaded cutlets on a wire rack over a baking sheet, spray with cooking oil, and bake at 425°F for 15 to 20 minutes, flipping halfway. Baked cutlets won’t be quite as crispy as fried but are still delicious and significantly lower in fat.
How thin should I pound the chicken?
Aim for approximately half-inch thickness throughout each cutlet. This ensures quick, even cooking where breading reaches perfect crispiness at the same moment chicken cooks through. Thinner is better than thicker for Italian Breaded Chicken—cutlets can be as thin as quarter inch and still remain juicy.
Can I use chicken thighs instead of breasts?
Boneless, skinless chicken thighs work for Italian Breaded Chicken, though cooking time may be slightly longer due to higher fat content. Thighs remain juicier than breasts and are more forgiving if slightly overcooked. Pound thighs to even thickness just like breasts for consistent results.
Why does my breading fall off during frying?
Breading falls off due to wet chicken, skipping the flour layer, not pressing breadcrumbs firmly enough, or flipping too early. Ensure chicken is dry, use the complete three-step breading process, press coating firmly at each stage, and let breaded cutlets rest before frying. Don’t flip until the first side is properly browned and releases easily from the pan.
Can I prepare these ahead of time?
You can bread Italian Breaded Chicken cutlets several hours ahead and refrigerate until ready to fry. The resting time actually improves adhesion. However, don’t bread them more than 8 hours in advance, as the coating may become soggy. For longer storage, freeze breaded raw cutlets and fry from frozen when needed.
What sides pair well with this dish?
Italian Breaded Chicken pairs beautifully with simple sides that don’t compete with the crispy cutlets. Try lemon wedges, arugula salad, roasted vegetables, pasta with marinara, sautéed green beans, or garlic bread. Keep sides light and fresh to balance the richness of the fried chicken.
Final Thoughts
Italian Breaded Chicken represents comfort food at its absolute best—simple ingredients transformed through proper technique into something extraordinary. The combination of crispy, golden breading and tender, juicy chicken creates textural contrast that satisfies on every level. Each cutlet delivers that perfect crunch followed by flavorful, succulent meat that makes every bite memorable.
Whether you’re preparing weeknight dinner for your family or creating something special for guests, this recipe delivers impressive results without requiring professional culinary skills. The techniques you learn while making Italian Breaded Chicken—particularly the proper breading method—transfer to countless other recipes, building your confidence and competence in the kitchen.
The beauty of Italian Breaded Chicken lies in its versatility and universal appeal. Follow the recipe exactly for classic Italian flavor, or customize with your favorite herb and cheese combinations to make it uniquely yours. Serve cutlets whole with simple sides, transform them into sandwiches, or slice them over salads. Each preparation showcases the perfect crispy coating and tender chicken.
Don’t be intimidated by the breading process or pan frying. With proper setup and attention to technique, anyone can master Italian Breaded Chicken. The key is organization, patience, and maintaining proper oil temperature throughout frying. These cutlets are so delicious and versatile that they’ll quickly become a regular part of your cooking rotation, impressing family and friends with restaurant-quality results from your own kitchen.


Watch the recipe video for more clarity
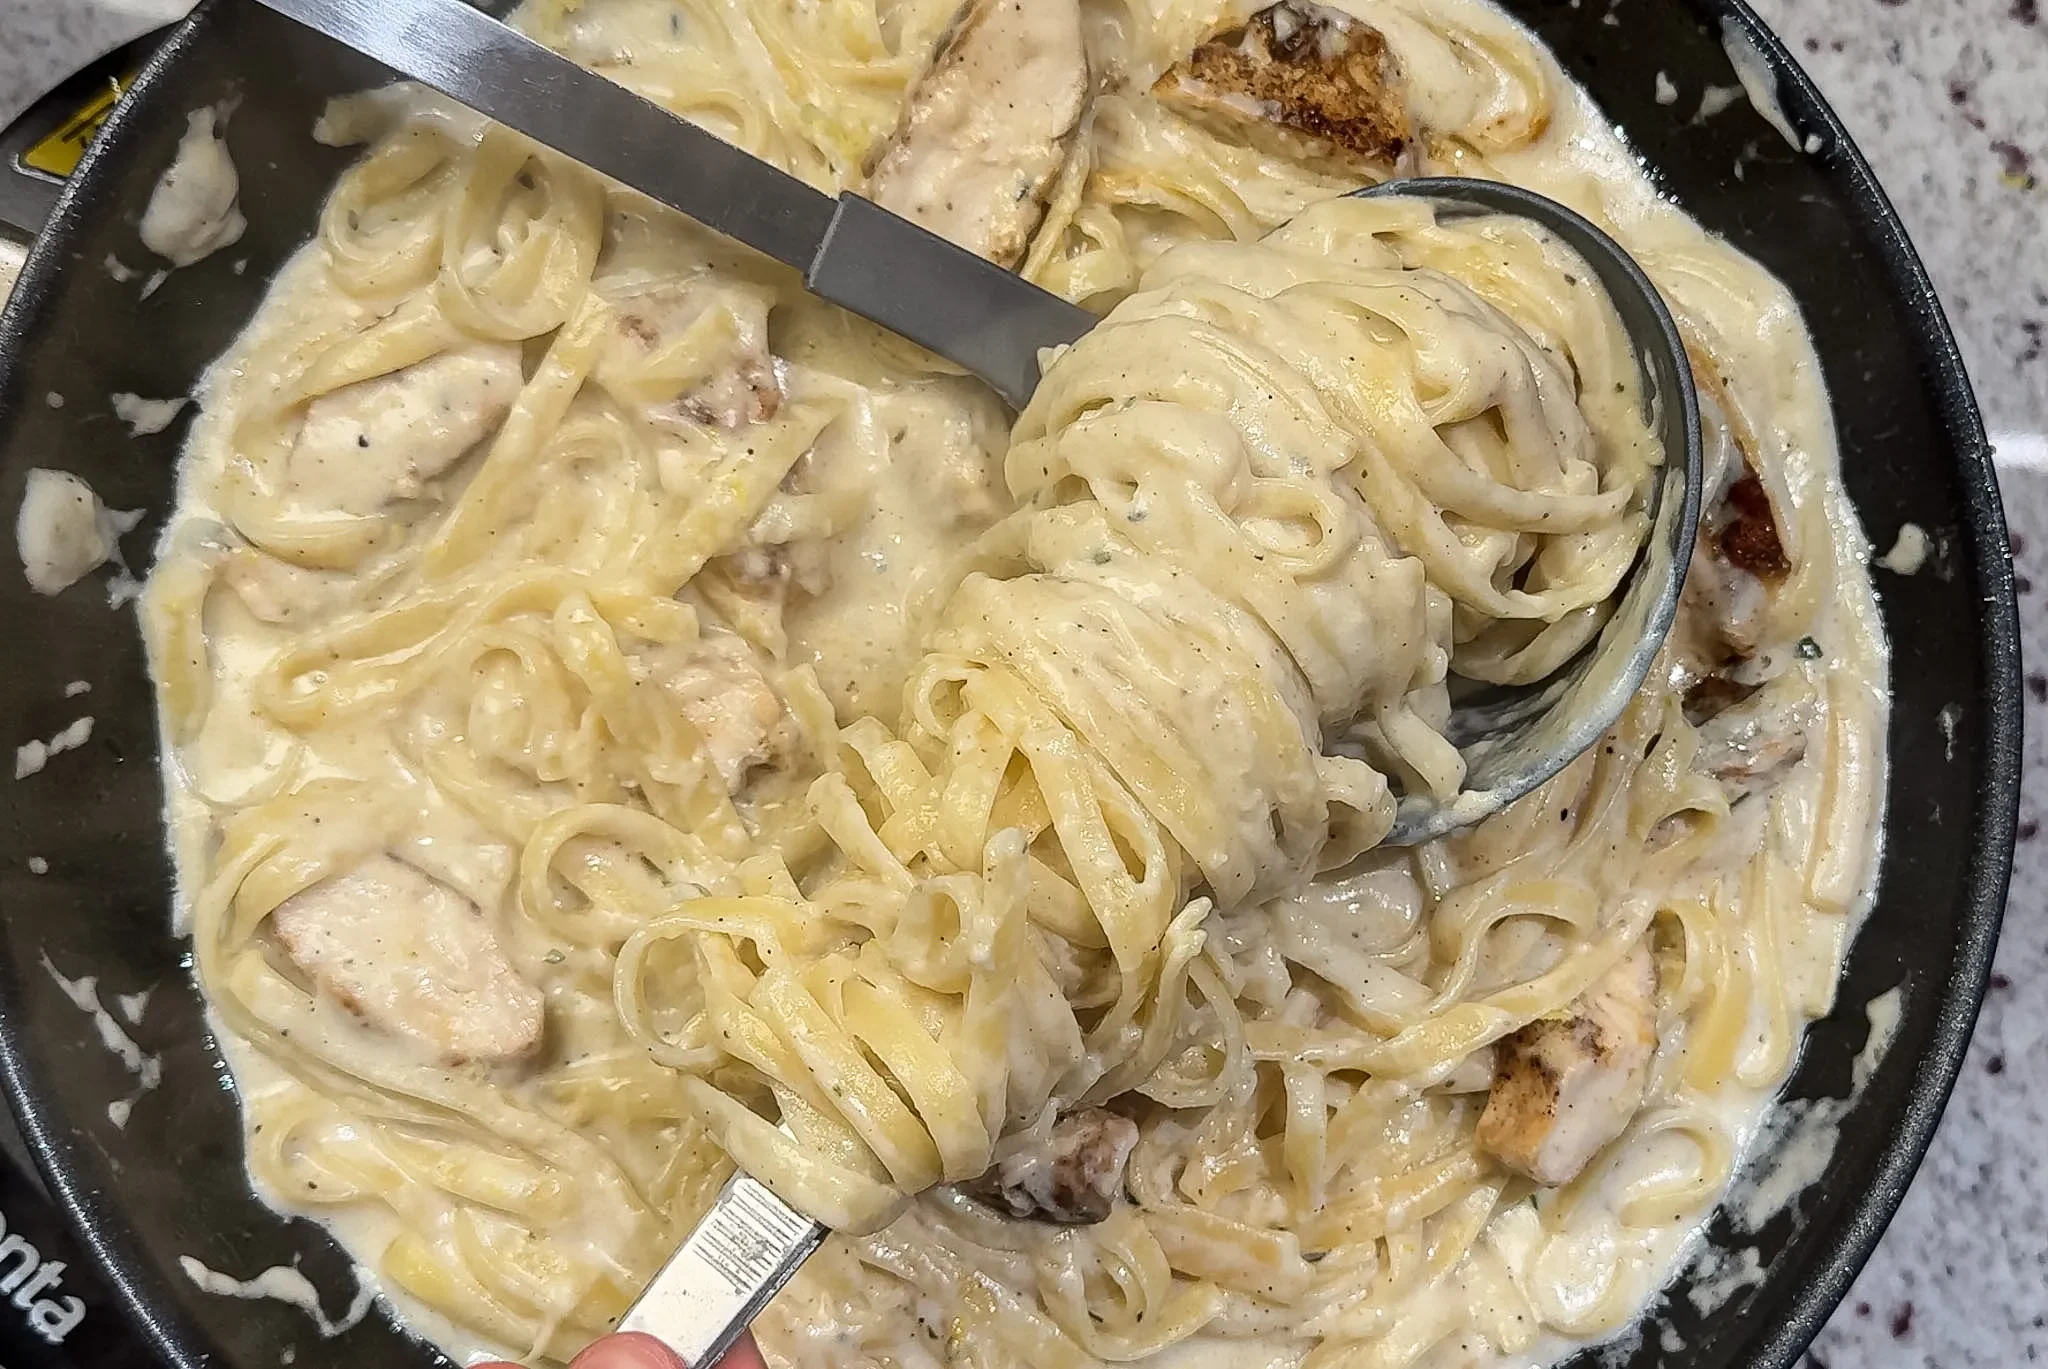
People also like our CAJUN CHICKEN PASTA Recipe
- 2 chicken breasts boneless and skinless, sliced in half
- 1 cup flour
- 2 eggs beaten
- Salt and pepper
- 2 tbsp garlic powder
- 1 tbsp onion powder
- 1 tbsp dried thyme
- 1 tbsp dried oregano
- 1 tbsp dried parsley
- 1 tbsp Italian seasoning
- 1 cup grated parmesan cheese
- 2 1/2 cup panko breadcrumbs
Add the breadcrumbs, garlic powder, parsley, Italian seasoning, oregano, salt, pepper and ¾ cup cheese to a medium shallow bowl.
In another medium, shallow bowl, whisk together 2 eggs and 1 tablespoon of water until combined.
Pour the flour into another shallow bowl or plate, season with salt, pepper and garlic powder and mix to combine.
Take one piece of thinly sliced chicken and place it on a cutting board. Place a piece of plastic wrap over top, then use a meat mallet to pound it out to be about ½ inch thick. Repeat with the remaining chicken.
Set up the breading station so that the chicken is on the far left, then next to it the flour, then the egg, then the breadcrumbs, and then a landing plate or pan to hold the breaded chicken.
Take a piece of chicken and dip it into the flour to coat on all sides, then tap off the excess.
Next, dip it in the egg mixture and let the excess drip off.
Transfer the chicken into the breadcrumbs. Be sure to press it down and move it around so that it's thoroughly coated. Place the chicken on the reserved plate, and repeat with the remaining pieces.
Heat a generous amount of olive oil in a large, heavy bottomed sauté pan over medium-high heat. Place 1-3 chicken breasts at a time, depending on how many your pan can hold. Don't overcrowd the pan.
Cook until golden brown on each side, then remove to a rack or paper towels to drain.
Serve immediately, or place in a 250 degree F oven for up to 1 hour before serving to keep warm.
If you've given this recipe a try and it won you over, please share your thoughts by leaving
a rating and comment below! If you have any questions about this recipe, don't hesitate to ask – I'm here to
help and will respond promptly.