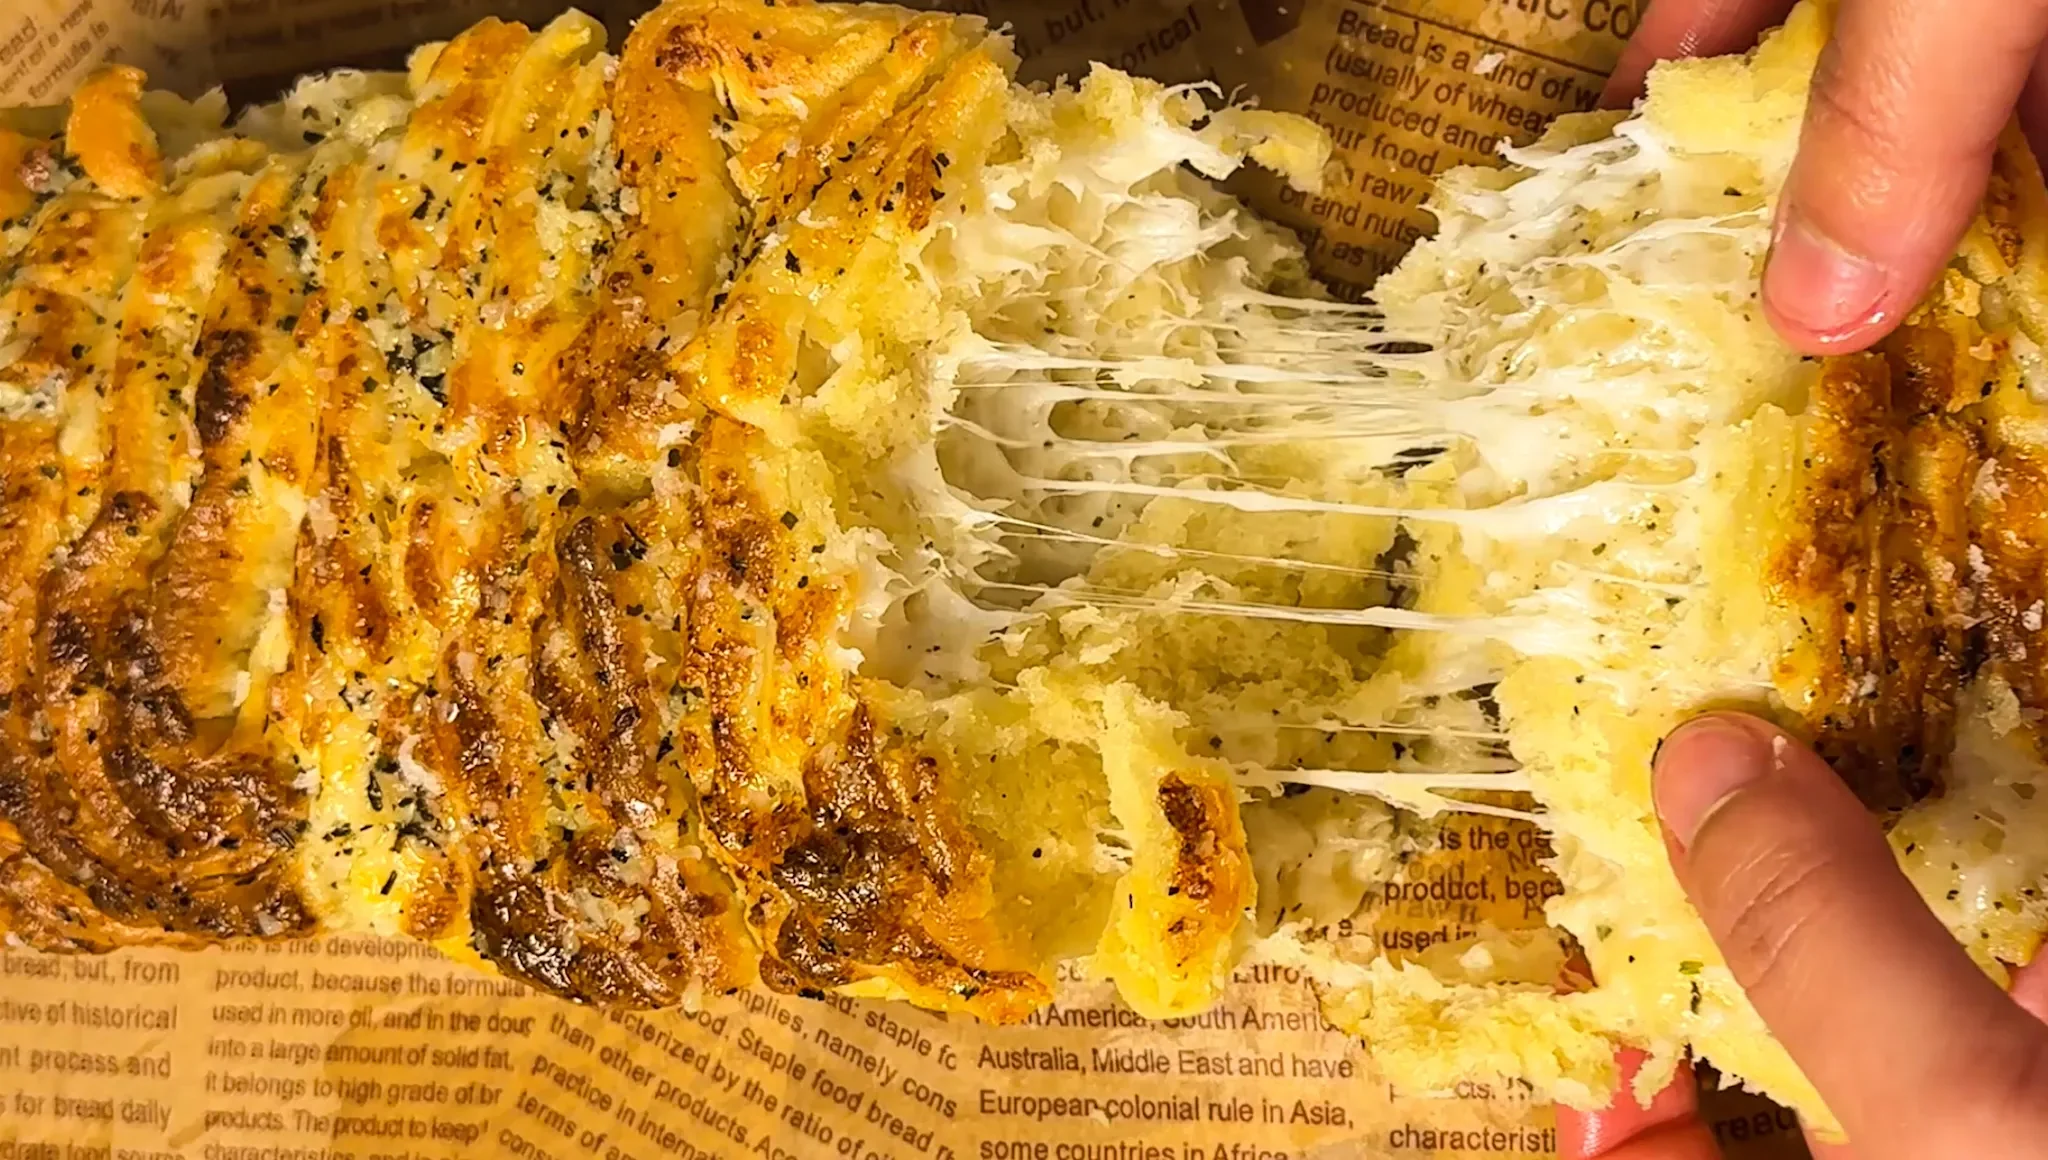
The Best Homemade Garlic Cheese Pull Apart Bread for Every Gathering
When you want to create something truly memorable for your table, this Garlic Cheese Pull Apart Bread delivers spectacular results every single time. This isn’t ordinary garlic bread sliced and buttered. This Garlic Cheese Pull Apart Bread features soft, fluffy homemade dough layered with buttery garlic filling and two types of melted cheese, baked until golden and brushed with even more garlic butter straight from the oven.
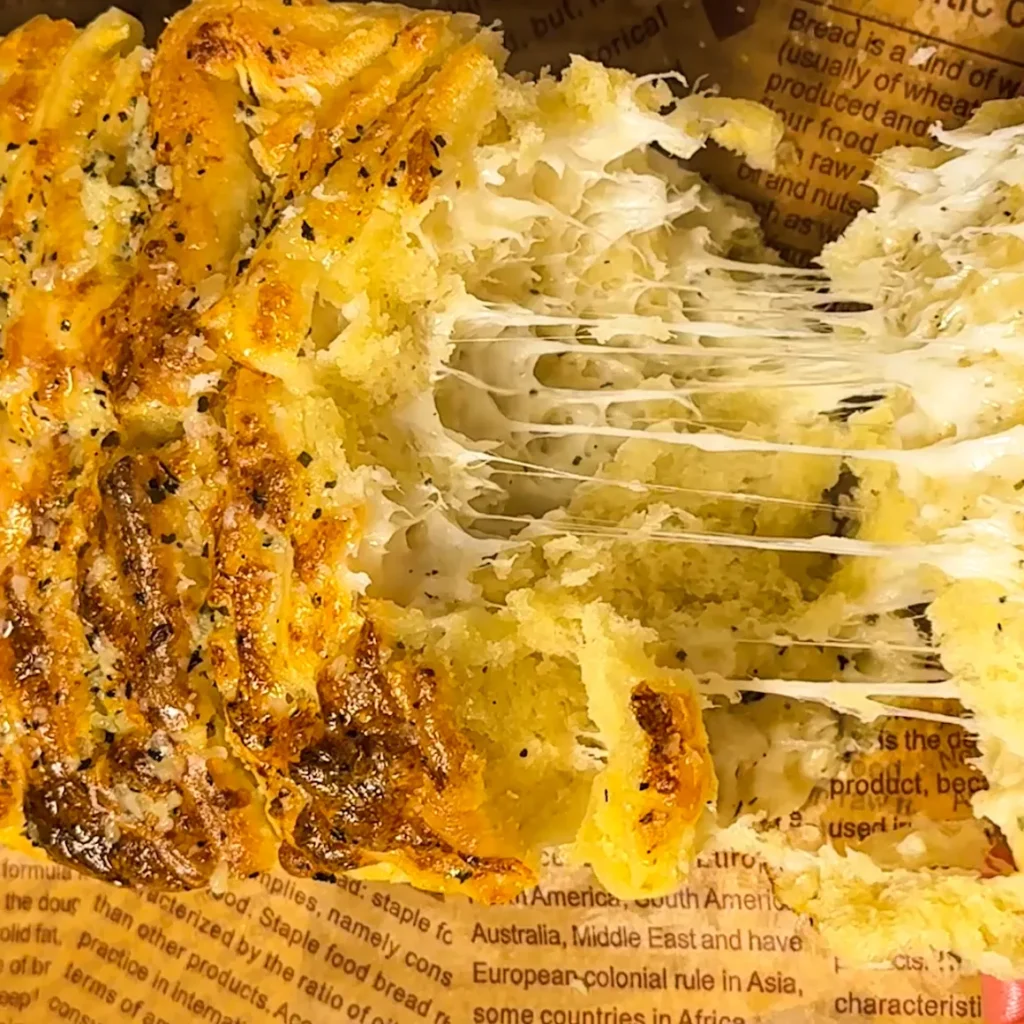
Making Garlic Cheese Pull Apart Bread from scratch might sound intimidating, but the process is surprisingly straightforward and incredibly rewarding. The tender milk-based dough creates layers that separate easily, each one soaked with garlic butter and held together by stretchy melted mozzarella and salty Parmesan. This Garlic Cheese Pull Apart Bread becomes the star of any meal, whether you’re serving it alongside pasta, soup, or placing it at the center of your dinner table.
The magic of this Garlic Cheese Pull Apart Bread lies in its shaping technique. Instead of baking a traditional loaf, the dough is rolled, filled, cut into strips, stacked, and arranged upright in the pan. This creates natural layers that guests can pull apart with their hands, making it interactive, fun, and absolutely irresistible. Let’s explore everything you need to know to create bakery-quality Garlic Cheese Pull Apart Bread in your own kitchen.
Why This Recipe is Special
This Garlic Cheese Pull Apart Bread stands apart from quick garlic bread recipes because it starts with enriched homemade dough. The dough contains whole milk, butter, and a touch of sugar, creating bread that stays soft and tender even after baking. Unlike crusty artisan breads, this Garlic Cheese Pull Apart Bread has a plush, fluffy texture that’s perfect for absorbing the rich garlic butter filling.
The layering technique used in this Garlic Cheese Pull Apart Bread ensures every single piece contains garlic butter and melted cheese. There are no plain spots or dry edges. Each layer gets individual attention during assembly, guaranteeing consistent flavor throughout the entire loaf. The combination of mozzarella for stretch and Parmesan for savory depth creates perfect cheese balance.
Key Ingredients Overview
Success with this Garlic Cheese Pull Apart Bread depends on quality ingredients working together harmoniously. Active dry yeast creates the rise and airy texture. Whole milk adds moisture and richness to the dough. Butter appears in three places in this recipe for the dough itself, the garlic filling, and the final brush creating maximum flavor. Fresh garlic delivers authentic taste that garlic powder alone cannot achieve. Mozzarella and Parmesan cheeses provide the perfect combination of melt and flavor in every layer of this Garlic Cheese Pull Apart Bread.

Understanding the Science Behind Perfect Garlic Cheese Pull Apart Bread
Creating exceptional Garlic Cheese Pull Apart Bread requires understanding how yeast dough develops. When flour combines with liquid and gets kneaded, gluten proteins align and create structure. This structure traps carbon dioxide bubbles produced by yeast, causing the dough to rise and creating the soft, airy crumb that makes this Garlic Cheese Pull Apart Bread so appealing.
The enriched dough formula in this Garlic Cheese Pull Apart Bread includes fat from butter and milk, which tenderizes the gluten structure. This is why the bread stays soft rather than becoming chewy like French bread. The small amount of sugar feeds the yeast, helping it activate faster while also adding subtle sweetness that balances the savory garlic and cheese.
The Role of Milk in Dough
Whole milk serves multiple crucial functions in this Garlic Cheese Pull Apart Bread recipe. The fat content keeps the crumb tender and moist, the proteins contribute to structure, and the sugars provide food for yeast. Using whole milk rather than skim or low-fat versions creates noticeably softer, richer results in your Garlic Cheese Pull Apart Bread.
Temperature matters tremendously when working with yeast for this Garlic Cheese Pull Apart Bread. The milk should feel warm to the touch but not hot, approximately one hundred to one hundred ten degrees Fahrenheit. Too hot and it kills the yeast, too cold and the yeast won’t activate properly. This careful temperature control ensures your Garlic Cheese Pull Apart Bread rises beautifully.
Butter Incorporation Technique
Adding butter gradually during kneading is essential for this Garlic Cheese Pull Apart Bread. When butter gets added all at once, it coats the flour particles and prevents proper gluten development. By incorporating it tablespoon by tablespoon after initial mixing, you allow the dough to build structure first, then soften as the butter integrates. This creates the perfect texture in your finished Garlic Cheese Pull Apart Bread.
The butter in this Garlic Cheese Pull Apart Bread should be softened to room temperature before adding to the dough. Cold butter won’t incorporate smoothly, creating uneven texture. Softened butter blends seamlessly, distributing fat evenly throughout the dough for consistent results.

Choosing the Right Ingredients for Garlic Cheese Pull Apart Bread
Quality ingredients make a significant difference in the final result of your Garlic Cheese Pull Apart Bread. Fresh yeast ensures reliable rising, while good cheese creates that irresistible stretch and flavor. Let’s examine each component in detail.
Yeast Selection and Testing
Active dry yeast works perfectly for this Garlic Cheese Pull Apart Bread recipe. Check the expiration date before using, as old yeast loses potency and won’t provide adequate rise. To test if your yeast is still active, combine it with warm milk and a pinch of sugar. After five to ten minutes, the mixture should foam and smell pleasantly yeasty. If nothing happens, your yeast is dead and needs replacing before attempting this Garlic Cheese Pull Apart Bread.
Instant yeast can substitute for active dry yeast in this Garlic Cheese Pull Apart Bread if needed. The main difference is that instant yeast can be mixed directly into the flour without proofing first. However, proofing the yeast provides visual confirmation that it’s working, which is why this recipe uses the traditional method.
Flour Considerations
All-purpose flour creates the ideal texture for this Garlic Cheese Pull Apart Bread. Bread flour contains more protein and would make the bread too chewy, while cake flour lacks sufficient structure. All-purpose flour provides the perfect balance for soft yet sturdy layers that hold together when pulled apart.
Measure flour correctly for this Garlic Cheese Pull Apart Bread by spooning it into the measuring cup and leveling it off. Scooping directly from the bag packs in excess flour, making your dough too dry and dense. Proper measuring ensures the dough has perfect hydration for easy kneading and beautiful rise.
Cheese Selection Strategy
Mozzarella cheese provides the stretch factor in this Garlic Cheese Pull Apart Bread. Use low-moisture mozzarella rather than fresh mozzarella, which contains too much water and makes the bread soggy. Shred the mozzarella yourself rather than buying pre-shredded for better melt and flavor. Pre-shredded cheese contains anti-caking agents that prevent smooth melting.
Parmesan cheese adds salty, savory complexity to this Garlic Cheese Pull Apart Bread. Freshly grated Parmesan tastes significantly better than the shelf-stable kind in green canisters. The real cheese melts better and provides authentic Italian flavor that elevates the entire loaf.
Fresh Garlic versus Garlic Powder
This Garlic Cheese Pull Apart Bread uses both fresh garlic and garlic powder strategically. Fresh minced garlic in the filling provides bold, authentic garlic flavor and aroma. Garlic powder in both the dough and filling adds depth and ensures consistent garlic taste throughout every layer. Using both creates more complex, satisfying results than either alone.
Mince the fresh garlic very fine for this Garlic Cheese Pull Apart Bread so it distributes evenly in the butter mixture. Large chunks can create overpowering garlic spots. A garlic press works perfectly for achieving the right consistency.

Step-by-Step Instructions for Perfect Garlic Cheese Pull Apart Bread
Follow these detailed steps to create flawless results with this Garlic Cheese Pull Apart Bread every time.
Activating the Yeast
Begin your Garlic Cheese Pull Apart Bread by warming one cup of whole milk to approximately one hundred to one hundred ten degrees Fahrenheit. Pour the warm milk into a large mixing bowl and sprinkle two and one-quarter teaspoons of active dry yeast over the surface. Add one tablespoon of sugar and stir gently. Let this mixture sit for five to ten minutes until it becomes foamy and fragrant.
If the yeast mixture doesn’t foam when making this Garlic Cheese Pull Apart Bread, the yeast is either dead or the milk temperature was incorrect. Start over with fresh yeast and properly warmed milk to ensure success. This step is crucial for achieving proper rise.
Mixing the Dough
Once the yeast is foamy for your Garlic Cheese Pull Apart Bread, add one egg, three tablespoons of softened butter, one teaspoon of salt, one teaspoon of garlic powder, and three cups of all-purpose flour. Mix with a wooden spoon or the paddle attachment of a stand mixer until a shaggy dough forms. The mixture will look rough and uneven at this stage.
Switch to the dough hook if using a stand mixer for this Garlic Cheese Pull Apart Bread, or turn the dough onto a floured surface for hand kneading. Knead for eight to ten minutes until the dough becomes smooth, elastic, and slightly tacky but not sticky. The dough should spring back when poked.
First Rise
Place the kneaded dough in a greased bowl, turning once to coat all sides with oil for your Garlic Cheese Pull Apart Bread. Cover the bowl with a clean kitchen towel or plastic wrap. Let the dough rise in a warm, draft-free location for one to one and a half hours until doubled in size. The dough should look puffy and feel airy when gently pressed.
Room temperature affects rising time for this Garlic Cheese Pull Apart Bread. Warmer kitchens produce faster rises, while cooler environments take longer. Judge doneness by appearance and texture rather than watching the clock strictly. The dough has risen enough when it holds an indentation when poked.
Preparing the Garlic Butter Filling
While the dough rises for your Garlic Cheese Pull Apart Bread, prepare the garlic butter filling. In a medium bowl, combine six tablespoons of softened butter, four cloves of minced fresh garlic, two tablespoons of fresh chopped parsley, one teaspoon of garlic powder, and half a teaspoon of salt. Mix until smooth and well combined. Set aside at room temperature.
The butter must be truly softened for this Garlic Cheese Pull Apart Bread filling, not melted or cold. Softened butter spreads easily across the dough surface without tearing. If you forgot to soften the butter, cut it into small pieces and let it sit at room temperature for thirty minutes.
Rolling and Filling the Dough
Once the dough has doubled, punch it down gently to release air bubbles for your Garlic Cheese Pull Apart Bread. Turn it onto a lightly floured surface and roll into a large rectangle approximately twelve by eighteen inches. The thickness should be fairly even across the entire surface.
Spread the garlic butter filling evenly over the dough for your Garlic Cheese Pull Apart Bread, leaving a small border around the edges. Sprinkle one and a half cups of shredded mozzarella and half a cup of grated Parmesan cheese over the butter layer. Press the cheese gently into the butter so it adheres.
Cutting and Stacking Layers
Using a sharp knife or pizza cutter, cut the filled dough lengthwise into six equal strips for your Garlic Cheese Pull Apart Bread. Stack these strips on top of each other, creating one tall stack of six layers. Cut this stack crosswise into six equal portions, creating six smaller stacks.
Grease a nine by five inch loaf pan thoroughly for your Garlic Cheese Pull Apart Bread. Place the six stacks upright in the pan, cut sides facing up, fitting them snugly together. The layers should stand vertically, showing all the beautiful cheese and butter layers. This arrangement creates the signature pull-apart effect.
Second Rise and Baking
Cover the filled loaf pan loosely with plastic wrap for your Garlic Cheese Pull Apart Bread. Let it rise in a warm place for thirty to forty-five minutes until noticeably puffy. The dough should rise about an inch above the rim of the pan. This second rise ensures soft, fluffy texture in the finished bread.
Preheat your oven to three hundred fifty degrees Fahrenheit. Bake the Garlic Cheese Pull Apart Bread for thirty-five to forty minutes until golden brown on top. If the surface browns too quickly, tent loosely with aluminum foil during the last fifteen minutes. The bread is done when it sounds hollow when tapped and reads one hundred ninety degrees Fahrenheit internally.
Final Garlic Butter Brush
Prepare the finishing butter while the Garlic Cheese Pull Apart Bread bakes. Melt two tablespoons of butter and stir in one clove of minced garlic. As soon as the bread comes out of the oven, brush this garlic butter generously over the top and down into the cracks. The hot bread absorbs the butter beautifully, creating incredible flavor and shine.
Let the Garlic Cheese Pull Apart Bread cool in the pan for ten minutes before carefully removing to a serving platter. The bread should hold together but separate easily when pulled. Serve warm for the best cheese stretch and maximum enjoyment.

Professional Tips for Exceptional Garlic Cheese Pull Apart Bread
These expert techniques ensure your Garlic Cheese Pull Apart Bread turns out perfectly every single time.
Temperature Management
Maintaining proper temperature throughout the process is crucial for this Garlic Cheese Pull Apart Bread. Keep ingredients at room temperature unless specified otherwise. Cold eggs and butter straight from the refrigerator slow down yeast activity and make mixing difficult. Plan ahead by taking these ingredients out thirty minutes before starting your Garlic Cheese Pull Apart Bread.
Create a warm rising environment for your Garlic Cheese Pull Apart Bread by turning on the oven for one minute, then turning it off and placing the covered bowl inside. The gentle warmth encourages yeast activity without cooking the dough. Alternatively, place the bowl near a sunny window or on top of the refrigerator where it’s slightly warmer.
Kneading Technique
Proper kneading develops the gluten structure essential for this Garlic Cheese Pull Apart Bread. Use the push-fold-turn method by pushing the dough away with the heels of your hands, folding it back over itself, and rotating ninety degrees. Repeat this motion rhythmically for eight to ten minutes. The dough transforms from rough and sticky to smooth and elastic.
Avoid adding too much flour while kneading your Garlic Cheese Pull Apart Bread. The dough should feel slightly tacky but not stick to your hands. Adding excess flour makes the bread dry and dense. If the dough seems too sticky, knead for a few more minutes rather than adding more flour immediately.
Achieving Even Layers
Cut the filled dough into equal strips and stacks for your Garlic Cheese Pull Apart Bread using a ruler if needed. Even portions ensure uniform baking and attractive presentation. Uneven pieces create some layers that overcook while others remain underdone.
Press the cheese gently into the butter filling before cutting your Garlic Cheese Pull Apart Bread. This prevents cheese from falling off during stacking and ensures every layer contains the right amount of filling. Well-adhered cheese creates better structure and more consistent flavor.
Preventing Dry Bread
Overbaking is the primary cause of dry Garlic Cheese Pull Apart Bread. Start checking for doneness at thirty-five minutes even if the recipe suggests forty. Oven temperatures vary, and it’s better to remove the bread slightly early than risk drying it out. The internal temperature should reach one hundred ninety degrees Fahrenheit.
Brushing with garlic butter immediately after baking helps keep your Garlic Cheese Pull Apart Bread moist. The butter soaks into the hot bread, adding moisture and preventing the surface from drying as it cools. Don’t skip this important finishing step.

Common Mistakes to Avoid with Garlic Cheese Pull Apart Bread
Learning from common errors helps you achieve perfect results with this Garlic Cheese Pull Apart Bread.
Killing the Yeast
The most frequent mistake when making Garlic Cheese Pull Apart Bread is using milk that’s too hot, which kills the yeast. Milk over one hundred twenty degrees Fahrenheit destroys yeast cells, preventing any rise. Always test the temperature with a thermometer or your finger. It should feel comfortably warm like bathwater, not hot.
If you accidentally kill the yeast in your Garlic Cheese Pull Apart Bread, you’ll notice the mixture doesn’t foam after ten minutes. There’s no way to rescue dead yeast, so you must start over with fresh yeast and properly warmed milk. Taking care with this first step prevents wasted time and ingredients.
Insufficient Kneading
Under-kneaded dough creates dense, heavy Garlic Cheese Pull Apart Bread that doesn’t rise properly. The gluten structure needs adequate development to trap yeast bubbles and create light texture. Knead until the dough passes the windowpane test by stretching a small piece thin enough to see light through without tearing.
Many beginners stop kneading their Garlic Cheese Pull Apart Bread too early because their arms get tired. Using a stand mixer eliminates this problem, but hand kneading is absolutely doable with persistence. The transformation from shaggy to smooth takes time, usually eight to ten minutes of continuous kneading.
Skipping the Second Rise
Shaping deflates much of the air created during the first rise of your Garlic Cheese Pull Apart Bread. The second rise allows the dough to puff up again, ensuring soft, fluffy texture in the finished bread. Skipping this step results in dense, compact layers that don’t separate nicely.
Even thirty minutes makes a significant difference in your Garlic Cheese Pull Apart Bread texture. If you’re short on time, at least allow twenty minutes of second rise. The dough should look noticeably puffy and risen above the pan rim before baking.
Uneven Butter Distribution
Spreading the garlic butter filling unevenly creates some layers with too much flavor and others that taste bland in your Garlic Cheese Pull Apart Bread. Take time to spread the mixture all the way to the edges and corners. Consistent distribution ensures every piece tastes equally delicious.
Using melted butter instead of softened butter for the filling causes problems in this Garlic Cheese Pull Apart Bread. Melted butter is too liquid and runs off the dough rather than staying in place. Softened butter has the perfect consistency for spreading while staying put.

Variations to Try with Garlic Cheese Pull Apart Bread
Once you’ve mastered the classic version, these creative variations add exciting new dimensions to this Garlic Cheese Pull Apart Bread.
Herb Additions
Transform your Garlic Cheese Pull Apart Bread by adding different fresh herbs to the filling. Try fresh basil, oregano, or thyme in addition to or instead of parsley. Italian seasoning blend works beautifully, adding complexity and aroma. Use about two tablespoons of fresh chopped herbs or one tablespoon of dried herbs.
For rosemary lovers, finely chop one tablespoon of fresh rosemary and add it to the garlic butter for your Garlic Cheese Pull Apart Bread. The piney, aromatic flavor pairs wonderfully with garlic and cheese, creating a sophisticated variation perfect for special dinners.
Cheese Combinations
Experiment with different cheese blends in your Garlic Cheese Pull Apart Bread. Try sharp cheddar instead of mozzarella for tangy flavor and beautiful orange color. Gruyere creates nutty richness, while fontina adds creamy smoothness. You can also use a four-cheese Italian blend for complex flavor.
For extra decadence, add cream cheese to your Garlic Cheese Pull Apart Bread filling. Dot small pieces of softened cream cheese over the garlic butter layer before adding shredded cheese. This creates pockets of creamy richness throughout the loaf.
Spicy Version
Create spicy Garlic Cheese Pull Apart Bread by adding red pepper flakes to the garlic butter filling. Start with one teaspoon and adjust to your heat preference. You can also sprinkle diced jalapenos over the cheese layer before rolling for fresh heat and flavor.
For smoky spice, add one teaspoon of smoked paprika to the filling for your Garlic Cheese Pull Apart Bread. This creates warmth without overwhelming heat while adding beautiful color and depth of flavor.
Bacon or Pepperoni Addition
Elevate your Garlic Cheese Pull Apart Bread by adding cooked, crumbled bacon to the cheese layer. About six strips of bacon, cooked crisp and chopped, distributes perfectly throughout the loaf. The salty, smoky flavor complements the garlic beautifully.
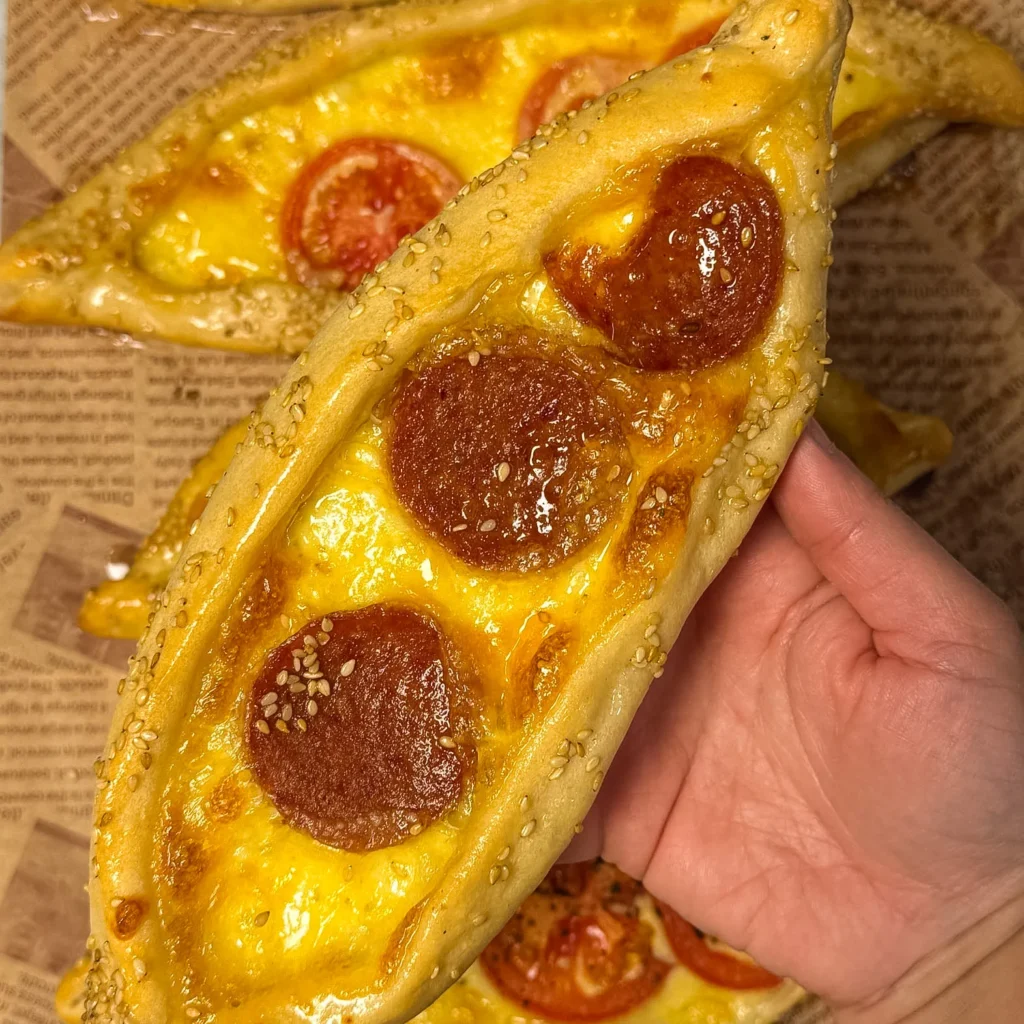
For pizza-inspired Garlic Cheese Pull Apart Bread, layer thin slices of pepperoni over the cheese before cutting and stacking. Add a sprinkle of Italian seasoning for authentic pizza flavor. This variation is especially popular with kids and makes a fun party bread.
Storage and Reheating Your Garlic Cheese Pull Apart Bread
Proper storage keeps your Garlic Cheese Pull Apart Bread fresh and delicious for several days.
Room Temperature Storage
Store Garlic Cheese Pull Apart Bread at room temperature for up to two days. Once completely cooled, wrap the loaf tightly in aluminum foil or plastic wrap to prevent it from drying out. Place the wrapped bread in an airtight container or resealable bag for extra protection against moisture loss.
Keep your wrapped Garlic Cheese Pull Apart Bread in a cool, dry place away from direct sunlight and heat sources. The bread stays soft at room temperature thanks to the enriched dough formula. Avoid refrigerating unless you need longer storage, as refrigeration can dry out the bread.
Refrigeration and Freezing
Refrigerate Garlic Cheese Pull Apart Bread for up to four days if needed. Wrap it tightly to prevent absorption of refrigerator odors. Let the bread come to room temperature before serving, or warm it in the oven for the best texture and flavor. Cold bread tastes less flavorful and has a firmer texture.
This Garlic Cheese Pull Apart Bread freezes beautifully for up to two months. Wrap the completely cooled loaf tightly in plastic wrap, then wrap again in aluminum foil or place in a freezer bag. Freeze the whole loaf or cut it into portions first for easier thawing. Thaw frozen bread overnight in the refrigerator, then warm before serving.
Reheating Methods
Reheat Garlic Cheese Pull Apart Bread in a preheated three hundred degree Fahrenheit oven for ten to fifteen minutes. Cover the bread loosely with aluminum foil to prevent the top from over-browning while the interior warms through. The bread should feel hot in the center and the cheese should be melty again.
For quick reheating, individual portions of Garlic Cheese Pull Apart Bread can go in the microwave for twenty to thirty seconds. However, oven reheating produces superior results with better texture. The microwave works in a pinch but can make the bread slightly rubbery if overheated.
Frequently Asked Questions About Garlic Cheese Pull Apart Bread
Can I make Garlic Cheese Pull Apart Bread without a stand mixer?
Absolutely. This Garlic Cheese Pull Apart Bread can be made entirely by hand using traditional kneading techniques. Mix the ingredients in a large bowl until a shaggy dough forms, then turn onto a floured surface and knead for eight to ten minutes. Hand kneading takes slightly more effort but produces identical results to machine mixing.
Why didn’t my Garlic Cheese Pull Apart Bread rise?
If your Garlic Cheese Pull Apart Bread didn’t rise, the yeast was likely inactive. This happens when the yeast is expired, the milk was too hot and killed the yeast, or the milk was too cold and didn’t activate the yeast. Always proof the yeast first to confirm it’s working before proceeding with the recipe.
Can I prepare Garlic Cheese Pull Apart Bread ahead of time?
Yes, this Garlic Cheese Pull Apart Bread is excellent for make-ahead preparation. Assemble the filled loaf in the pan, cover tightly with plastic wrap, and refrigerate overnight. The next day, let it sit at room temperature for thirty minutes, then proceed with the second rise and baking. The cold fermentation actually improves flavor.
What size loaf pan works best for this recipe?
A standard nine by five inch loaf pan is perfect for this Garlic Cheese Pull Apart Bread. This size accommodates all six stacks comfortably while ensuring the layers bake evenly. Using a different size pan may require adjusting the number of stacks or the amount of dough.
Can I use instant yeast instead of active dry yeast?
Yes, instant yeast works perfectly in this Garlic Cheese Pull Apart Bread. You can mix instant yeast directly into the flour without proofing first. However, proofing provides visual confirmation that your yeast is active, which is helpful for beginners. Use the same amount of instant yeast as active dry yeast.
How do I know when the bread is fully baked?
Your Garlic Cheese Pull Apart Bread is done when the top is golden brown and the internal temperature reaches one hundred ninety degrees Fahrenheit. The bread should sound hollow when tapped on top. If you’re unsure, it’s better to bake an extra few minutes than to underbake, which creates gummy texture.
Final Thoughts on Garlic Cheese Pull Apart Bread
This Garlic Cheese Pull Apart Bread represents the perfect marriage of homemade bread baking and crowd-pleasing flavors. The soft, fluffy layers soaked with garlic butter and studded with melted cheese create something truly special that goes far beyond ordinary garlic bread. Each pull reveals another perfectly seasoned piece that’s impossible to resist.
What makes this Garlic Cheese Pull Apart Bread so appealing is its versatility. Serve it as an impressive appetizer at dinner parties, pair it with pasta or soup for a complete meal, or simply enjoy it as a comfort food indulgence. The interactive nature of pulling apart the layers makes it fun for gatherings, while the incredible aroma filling your kitchen creates anticipation that the taste absolutely delivers on.
Whether you’re an experienced bread baker or attempting yeast dough for the first time, this Garlic Cheese Pull Apart Bread is approachable and forgiving. The steps are logical and straightforward, the ingredients are accessible, and the results are consistently excellent. Your family and guests will be amazed that you made such professional-looking, delicious bread from scratch.
So gather your ingredients, warm that milk carefully, and experience the satisfaction of creating this Garlic Cheese Pull Apart Bread in your own kitchen. The process is meditative and rewarding, while the final product brings pure joy to everyone who tastes it. This recipe deserves a permanent place in your baking repertoire, ready to impress at a moment’s notice. Once you master this Garlic Cheese Pull Apart Bread, you’ll find yourself making it again and again for every special occasion and cozy weekend at home.
Watch the recipe video for more clarity!
See our similar recipes:
People also like our these recipes:
Bread Dough
- 450 g bread flour 3¾ cups
- 260 g whole milk warm (1 cup + 1 tbsp)
- 58 g unsalted butter softened (¼ cup / ½ stick)
- 12 g granulated sugar 1 tbsp
- 7 g active dry yeast 2¼ tsp
- 5 g salt 1 tsp
- 3 g garlic powder 1 tsp
Filling
- 113 g unsalted butter softened (½ cup / 1 stick)
- 227 g mozzarella cheese shredded (8 oz)
- 30 g Parmesan cheese grated (¼ cup)
- 22 g garlic minced (about 6 cloves)
- 6 g parsley chopped (1 tbsp)
- 2 g garlic powder ½ tsp
- 1 g salt ¼ tsp
Garlic Butter Topping
- 58 g unsalted butter melted (¼ cup)
- 6 g parsley chopped (1 tbsp)
- 2 g garlic powder ½ tsp
- Salt to taste
Make the Filling
In a small bowl, mix softened butter, garlic, parsley, garlic powder, and salt until well combined. Set aside.
Make the Dough
In a large bowl, combine warm milk and sugar. Sprinkle yeast over the top, stir lightly, and let sit for 5–10 minutes until foamy.
Add flour, garlic powder, and salt. Mix until a rough dough forms.
Begin kneading. Once the dough starts coming together, add softened butter 1 tablespoon at a time, kneading well between additions.
Knead for 8–10 minutes by hand or 5–6 minutes in a stand mixer until smooth, elastic, and slightly tacky.
Transfer dough to a lightly greased bowl, cover, and let rise 1–1½ hours or until doubled.
Assemble
Punch down the dough and roll into a 12×18-inch rectangle.
Spread the garlic butter filling evenly over the surface.
Sprinkle mozzarella and Parmesan evenly on top.
Cut dough into strips, stack them, then cut again so pieces fit upright in a greased loaf pan.
Cover loosely and let rise 30–40 minutes until puffy.
Bake
Bake at 350°F (175°C) for 35–40 minutes, tenting with foil if the top browns too quickly.
Finish
Mix melted butter, parsley, garlic powder, and salt.
Brush generously over hot bread straight from the oven.
Let cool slightly, pull apart, and enjoy warm.
If you've given this recipe a try and it won you over, please share your thoughts by leaving
a rating and comment below! If you have any questions about this recipe, don't hesitate to ask – I'm here to
help and will respond promptly.